|
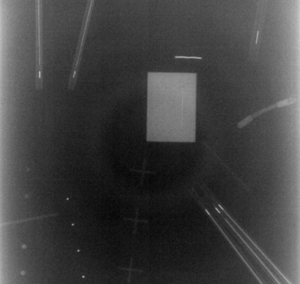 |
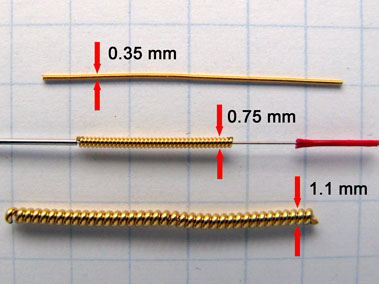
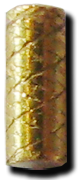
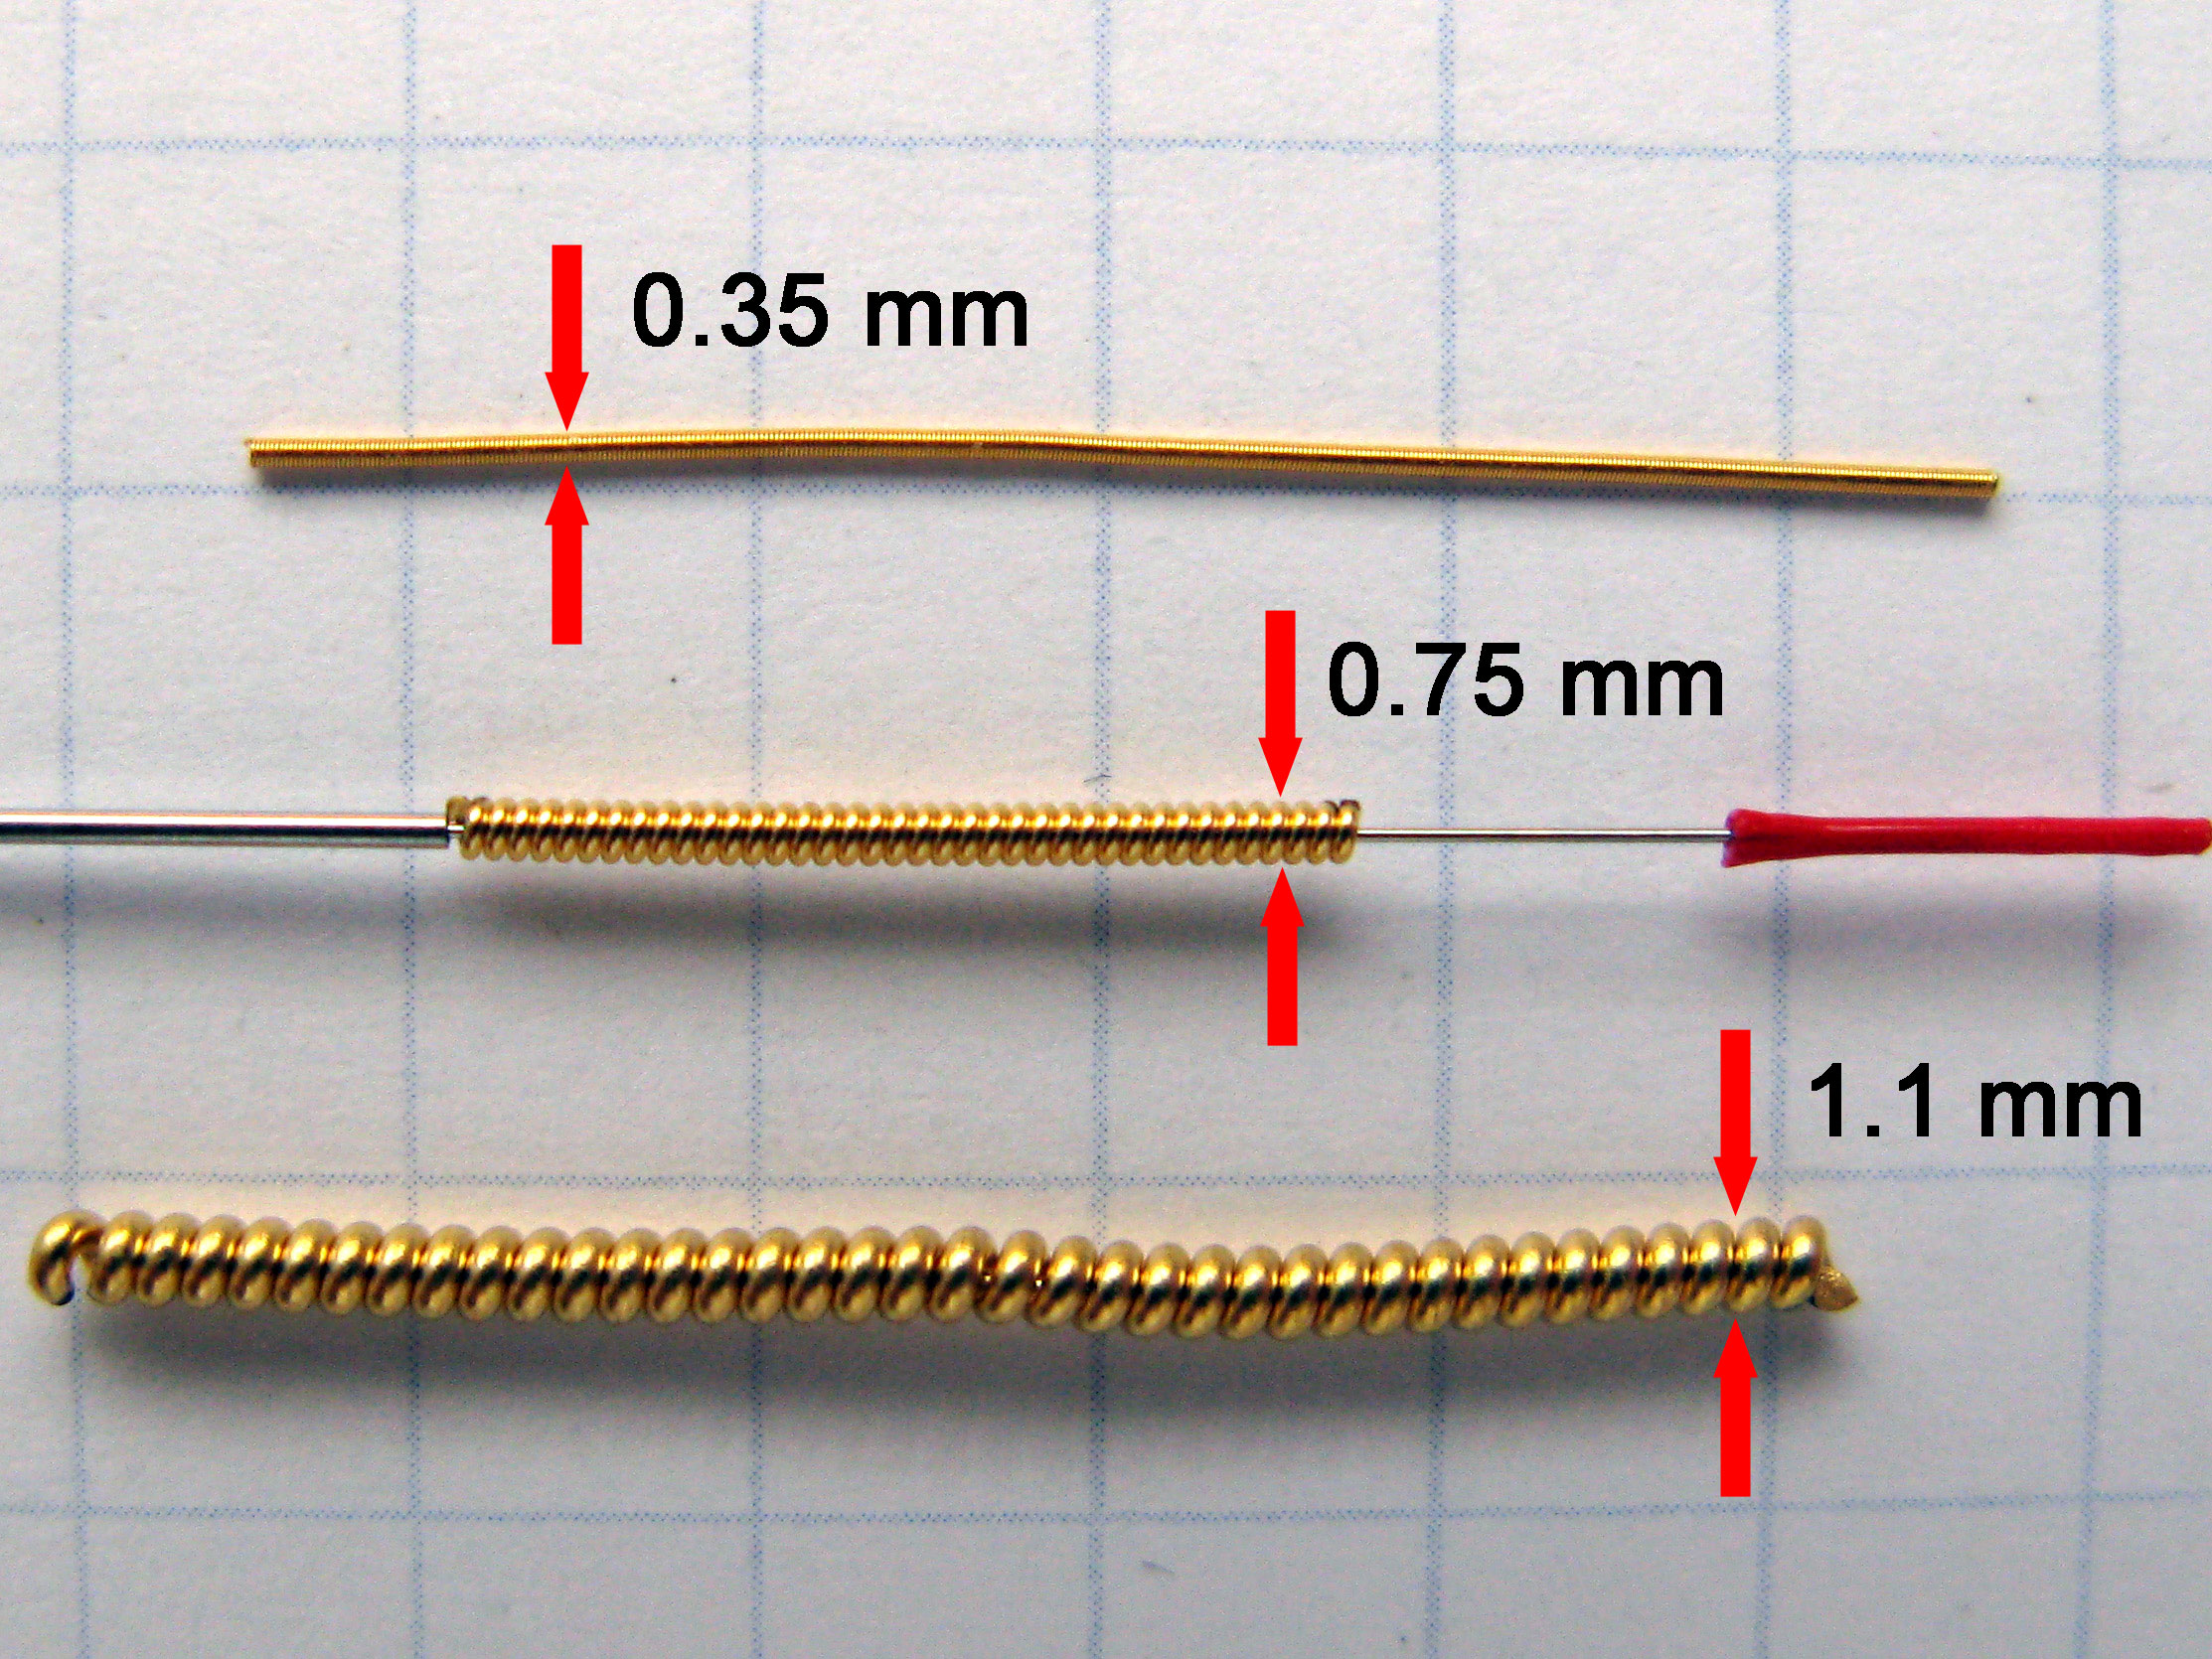
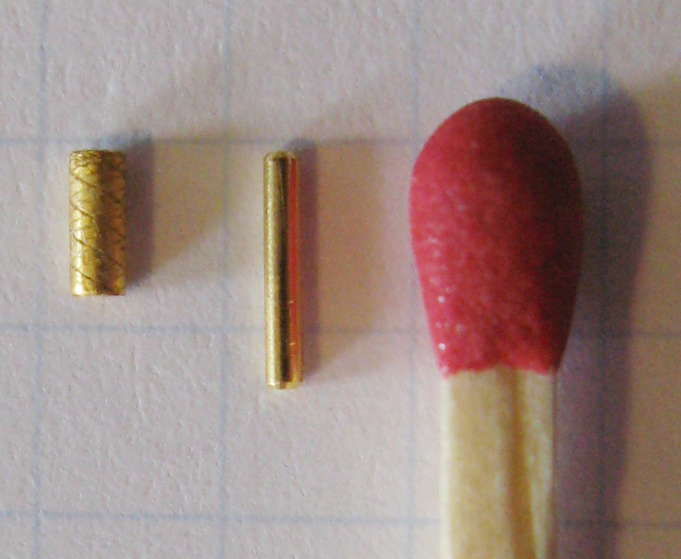
Fig.1: Visicoil gold markers |
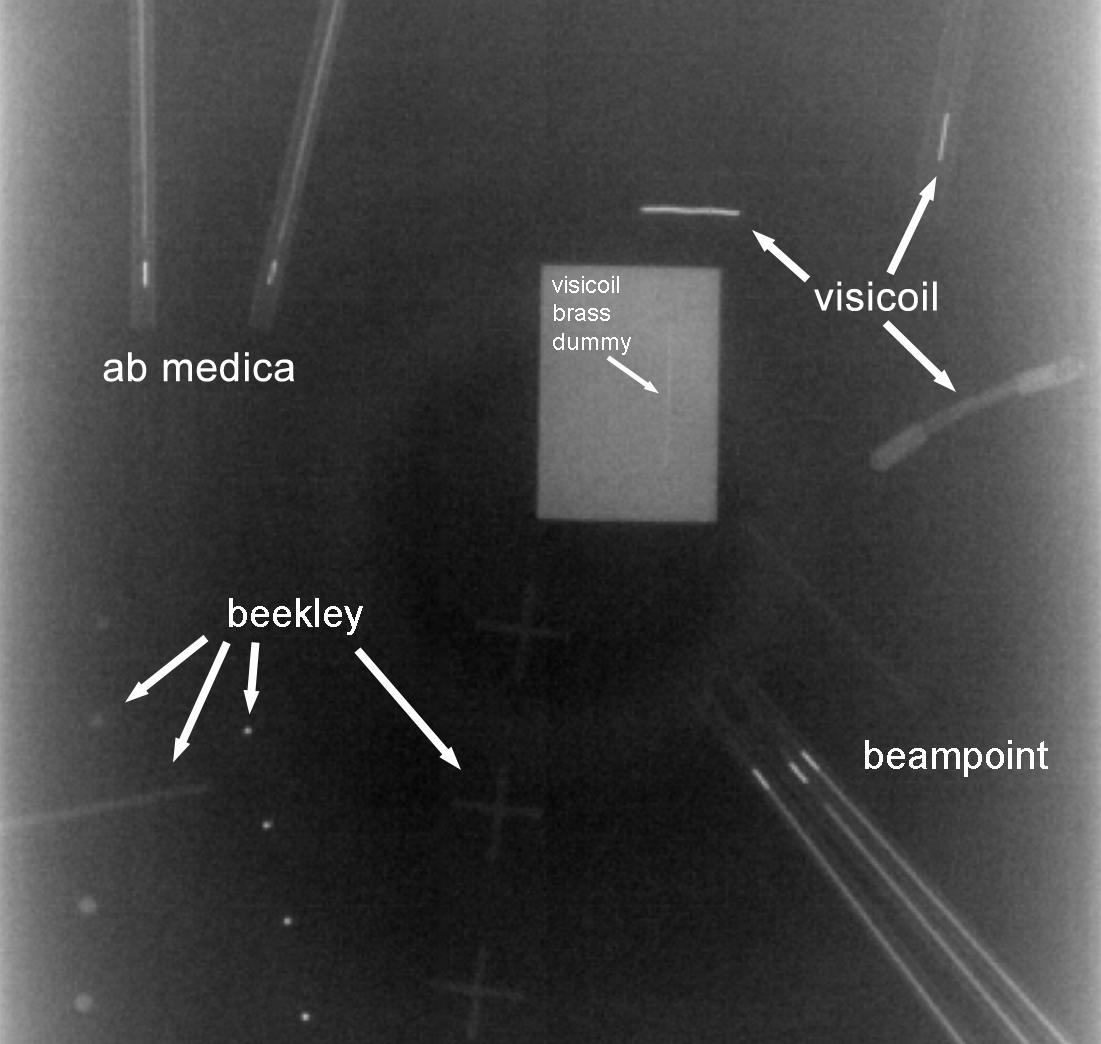
Fig.2: Port image of different markers (click for names) |
When a 30 cm lucite block is used to simulate patient scatter, the visibility on the port image is a little poorer. Fig.3 shows, from left to right, 3 Gold Soft Tissue Markers (Acculoc markers) from Civco (formerly MedTec),1 from ab medica, 3 from Beampoint in Sweden and again 1 from ab medica. On this image, the Civco markers are the only ones with a diameter of 1.2 mm. The Goldlock-markers from Beampoint are 1 x 5 mm and have a star-shaped cross section, the markers from ab medica are simple rods of 0.9 x 5 mm.
Note that practically all companies offer all dimensions. Visibility depends on the dimension, not on the vendor.
|
 |
| Marker implantation |
Fig.3: Prostate markers |
The markers come in hollow needles (e.g., 19 to 17 Ga), which are sterile packed. Usually three gold markers are implanted by an experienced Urologist in our hospital under ultrasound guidance: one at the base, one at the mid gland, and one at the apex (see port images below). Both transrectal and transpubic implantation is possible. Antibiotics are given one day before and on the day of the implantation.
About two weeks after the implantation, the planning CT is aquired (so that the prostate may recover from the irritation). After CT, the treatment preparation proceeds as usual: a 3D plan is created (either IMRT or conformal), the plan is simulated, then treated.
|
 |
| Example |
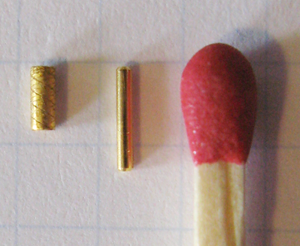
Fig.4: Civco and ab medica in direct comparison |
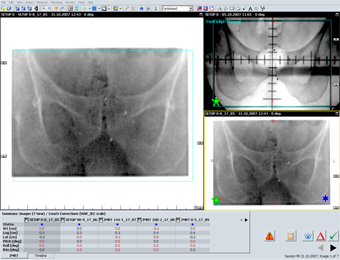
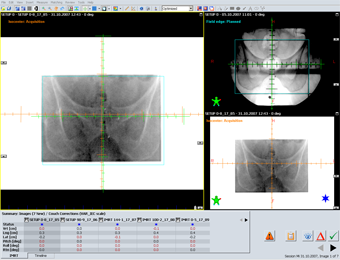
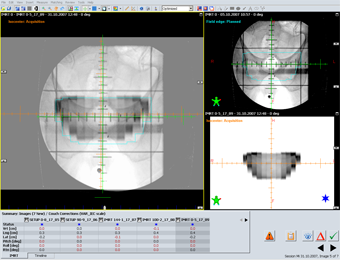
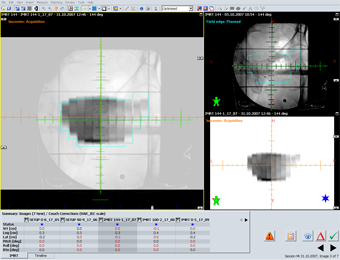
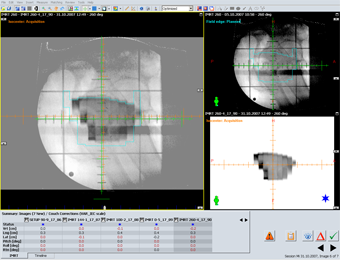
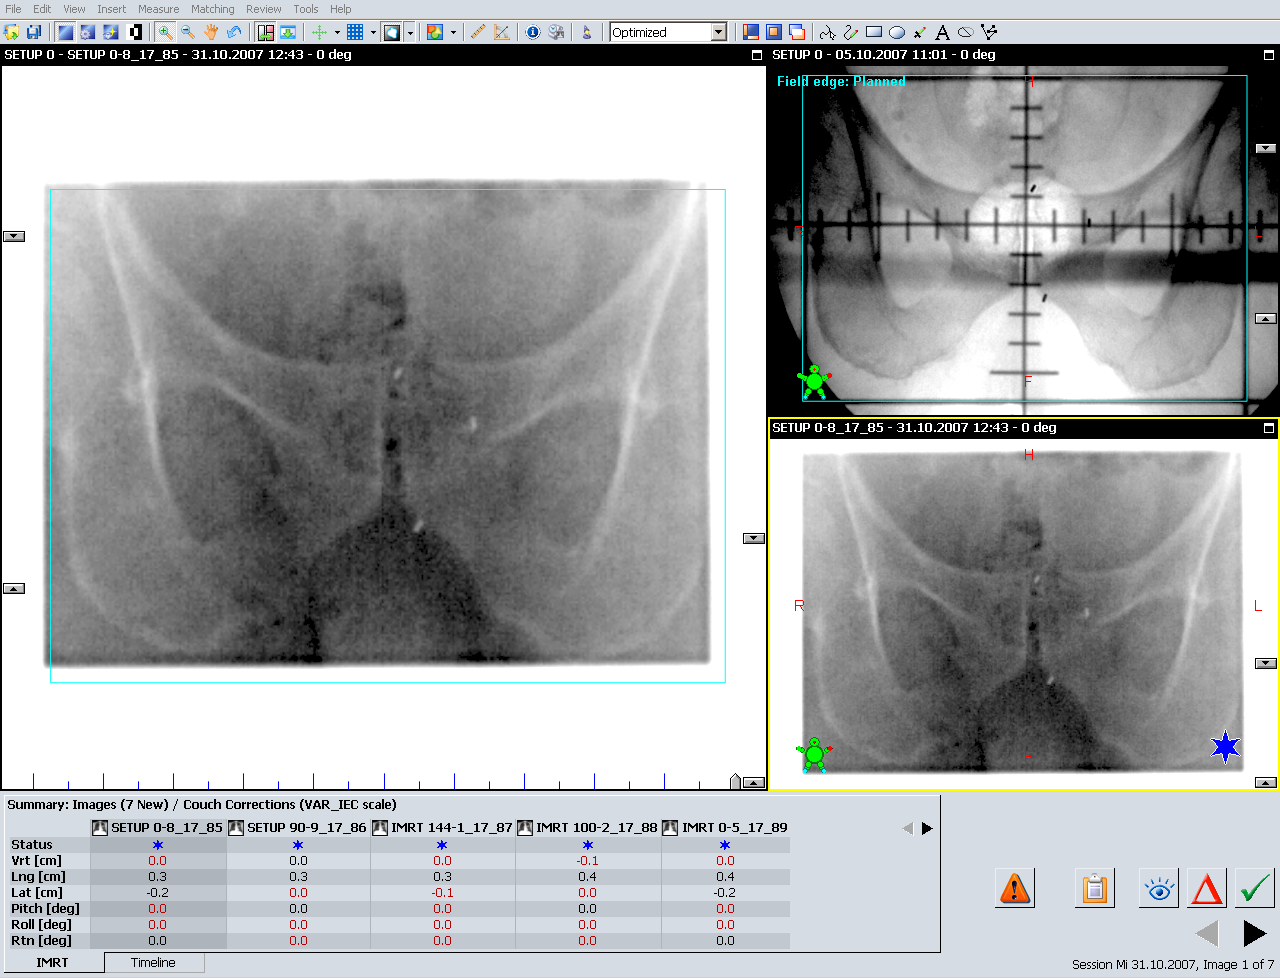
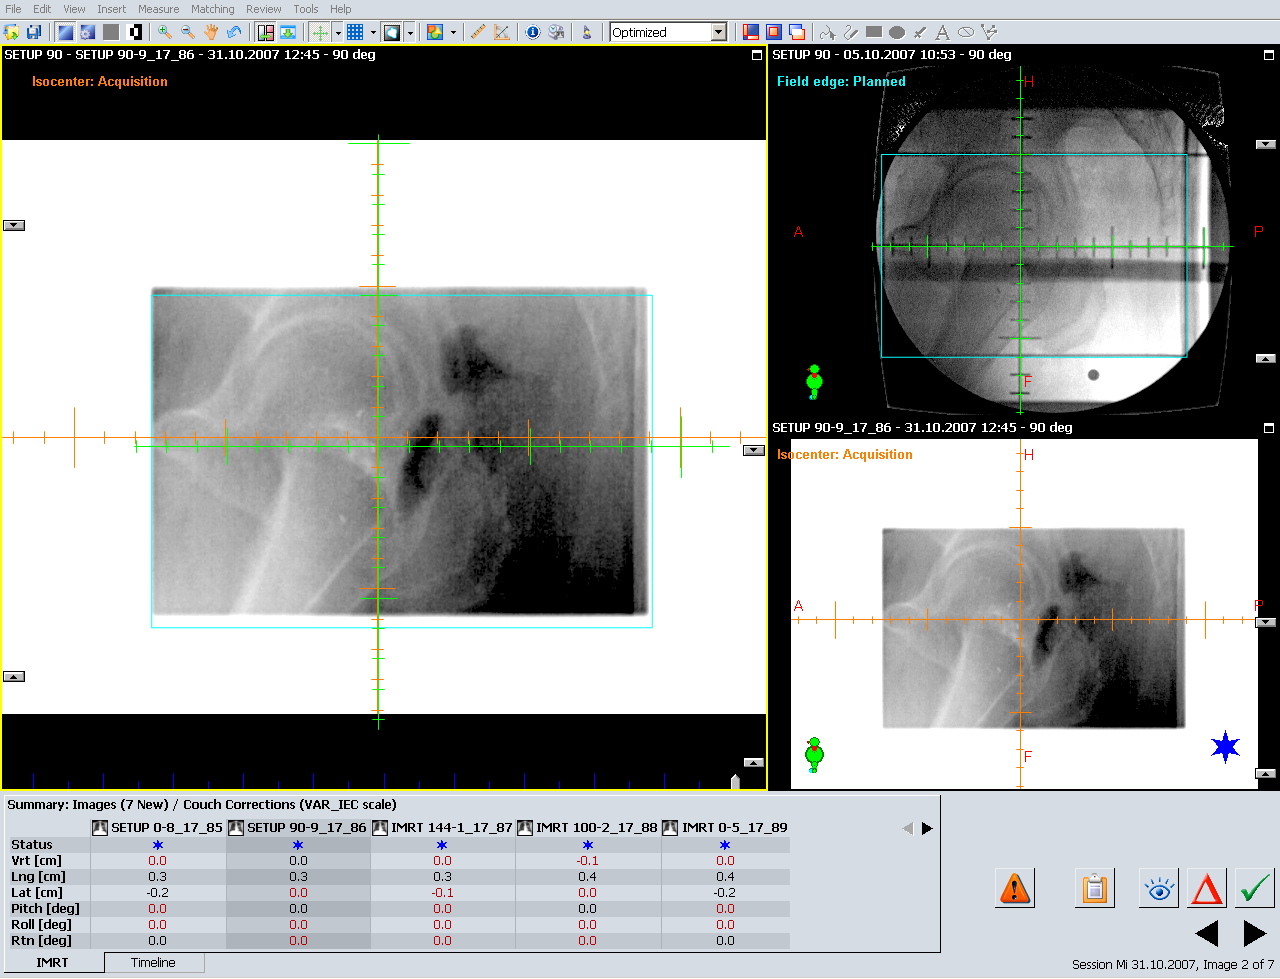
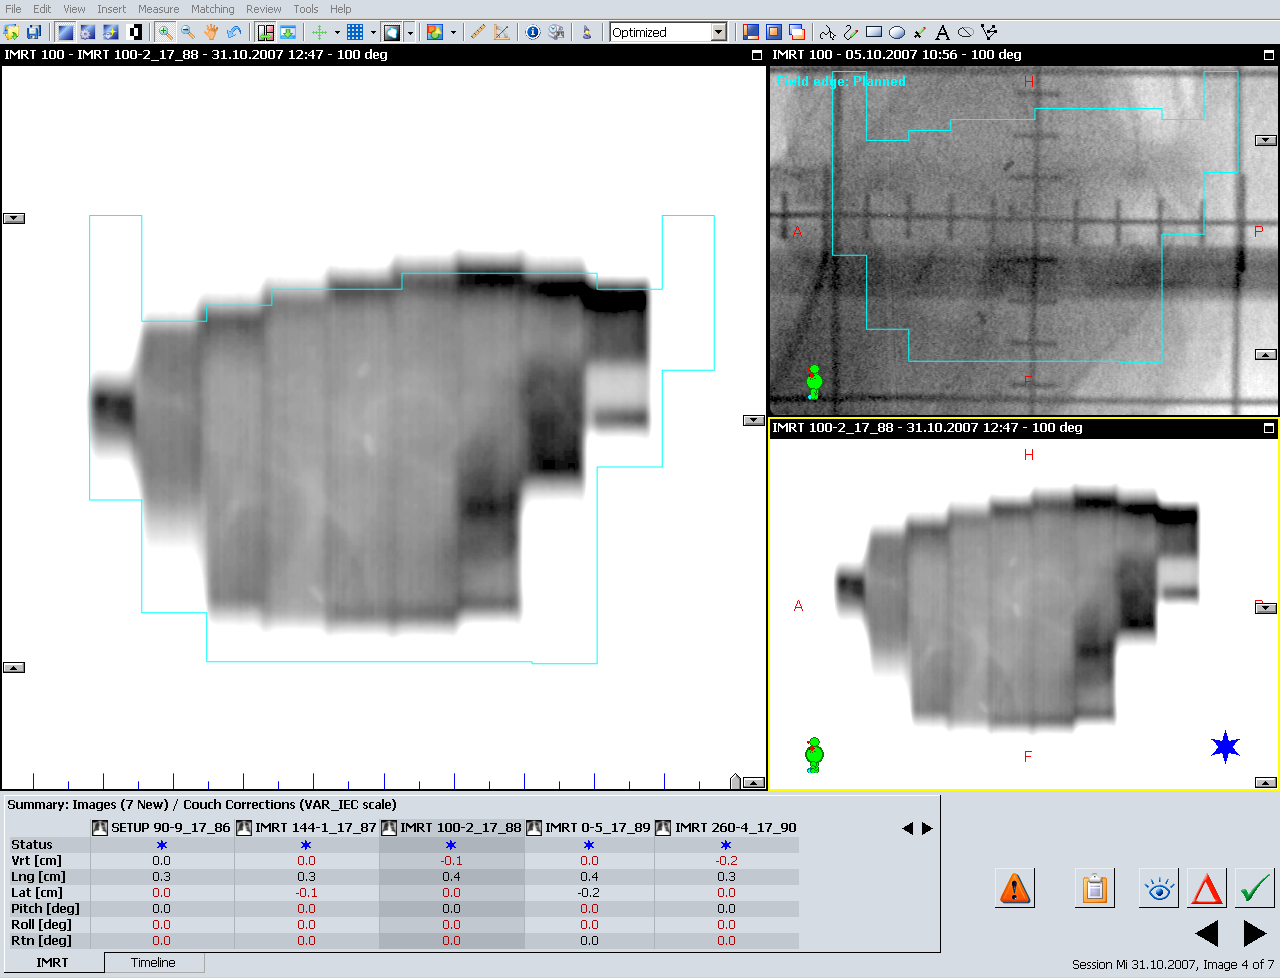
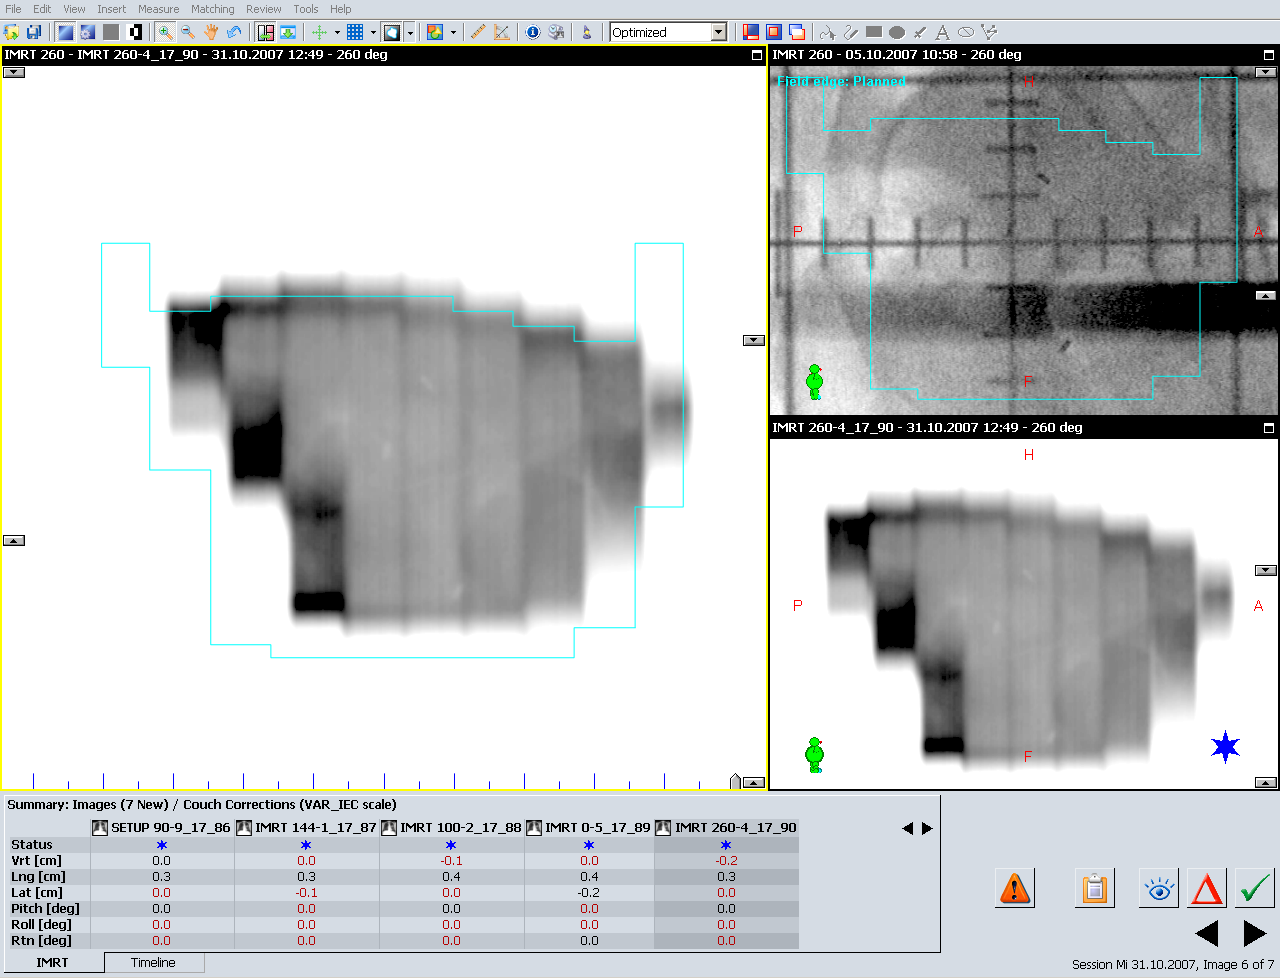
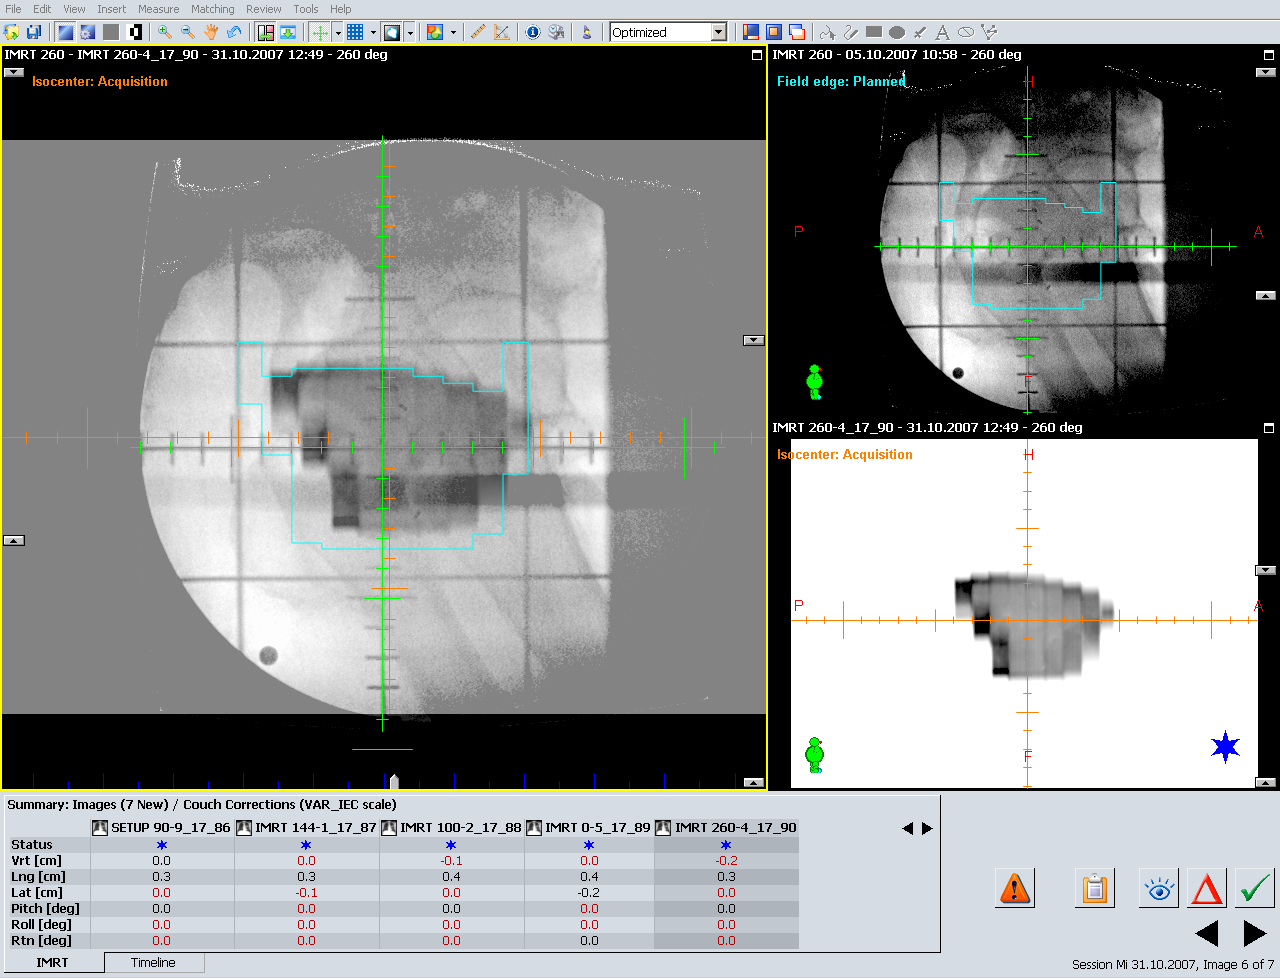
The following example shows the portal images of a typical prostate case. The plan has two orthogonal setup fields and five sliding window IMRT fields.
First, the setup images are acquired with the aS500 port imager. On the 4D treatment console, the image is online matched to the reference image from Simulation. The relevant structure in this case was the marker in the apex of the prostate. This is a patient specific rule, given by the primary oncologist responsible for the patient. The order could as well be: "For this patient, match to the group of three markers", for another it could be: "Match to the middle marker". Matching to a single marker has the advantage that the rule is clear, and matching two point-like markers is an easy thing to do. Of course, the other markers are not ignored! If they would move away from each other, this could mean that a marker might be migrating. Civco markers were used here.
|
 |
 |
 |
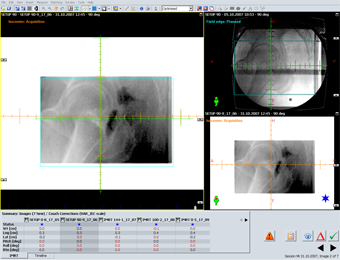 |
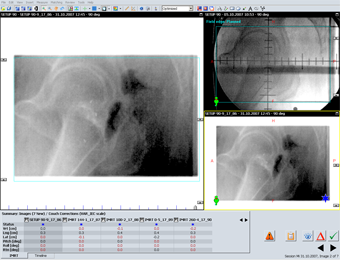
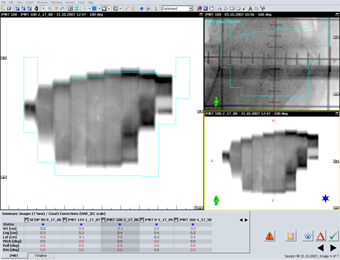
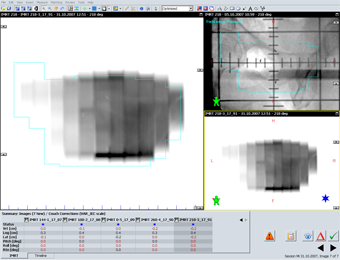
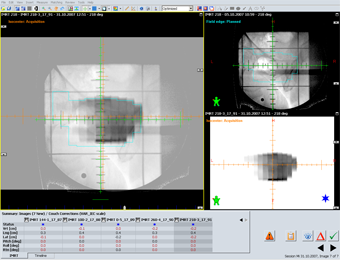
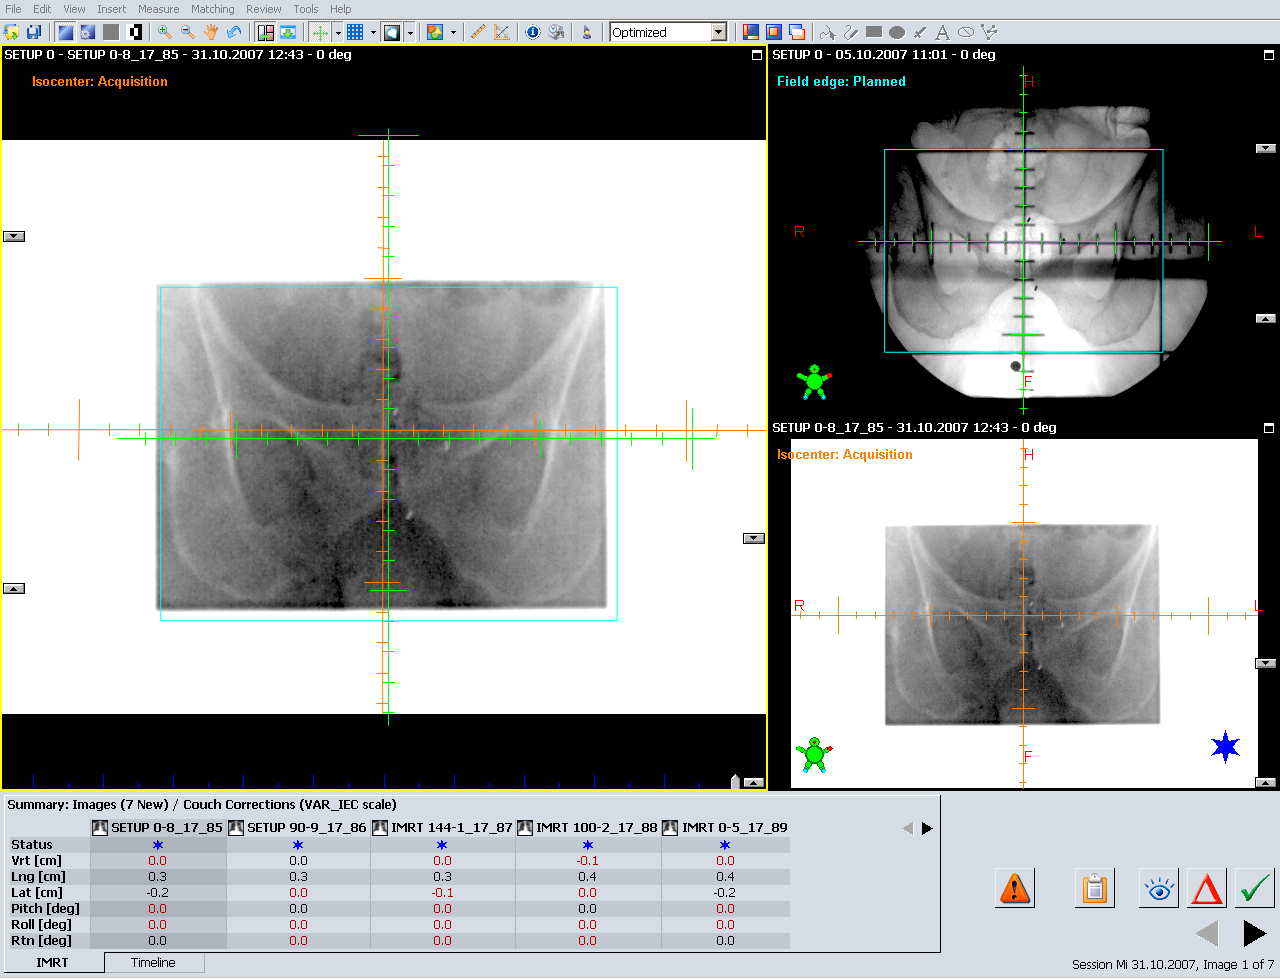
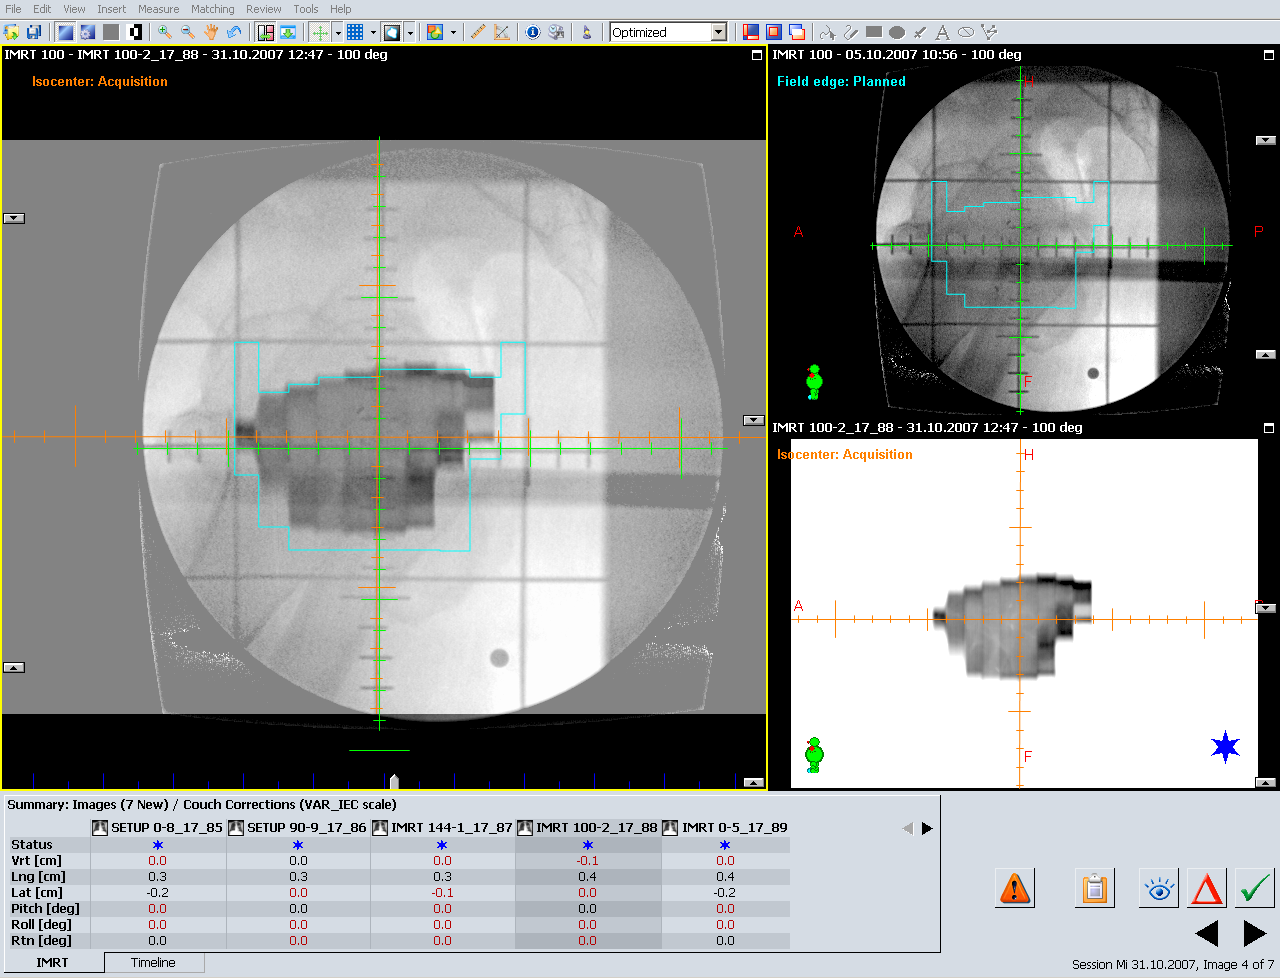
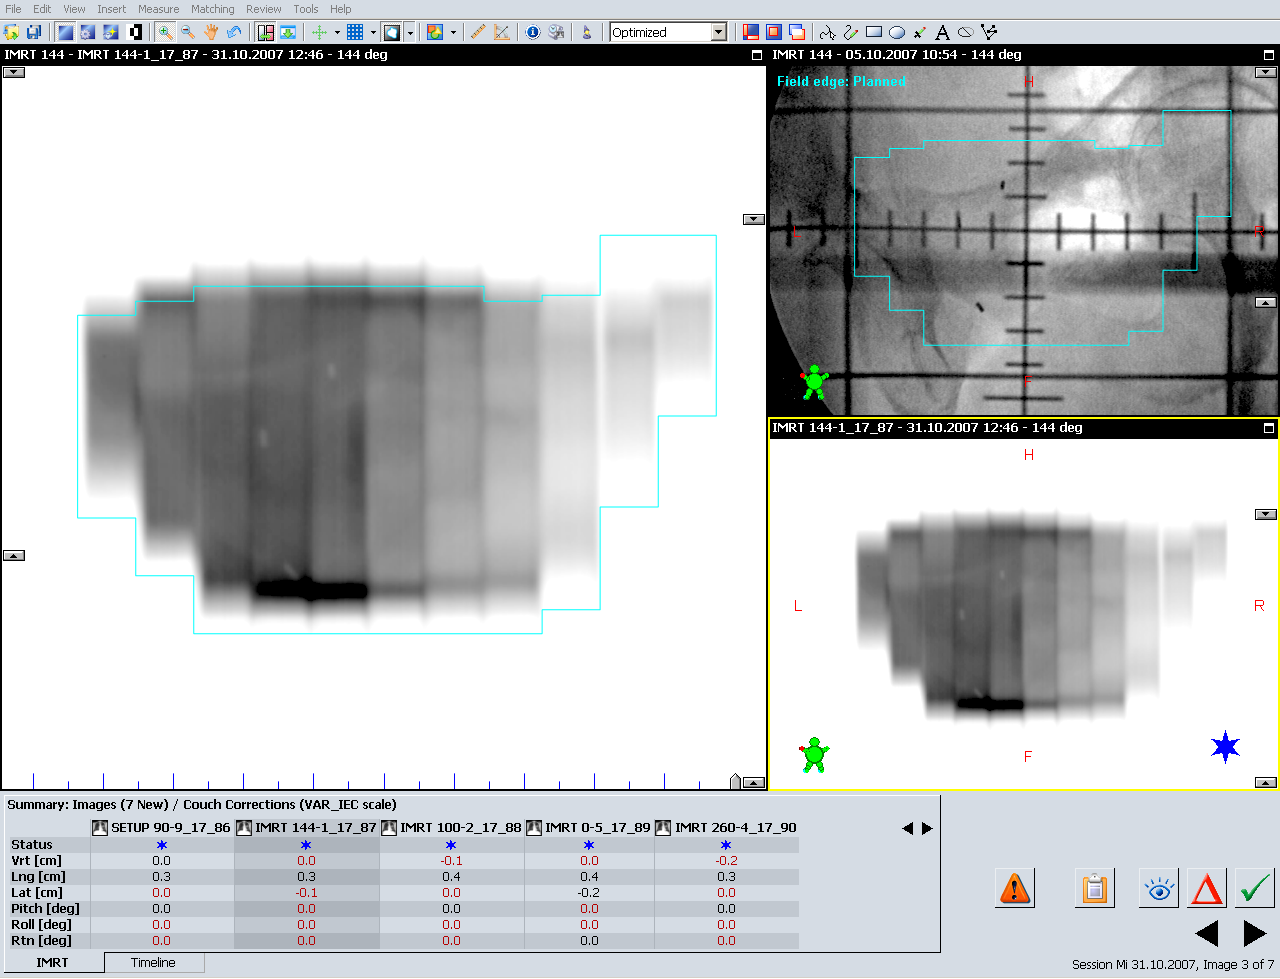
On all images, the markers are clearly visible and matching is easy. On the bottom of the Offline Review screens, the residual match error can be seen in centimeters. The values are still a little user-dependent, but much less for marker-matching than the user-dependency was during bone-matching.
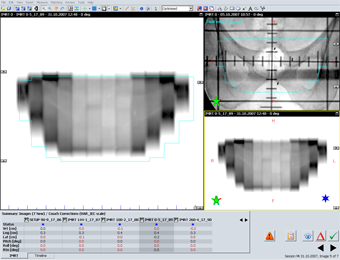
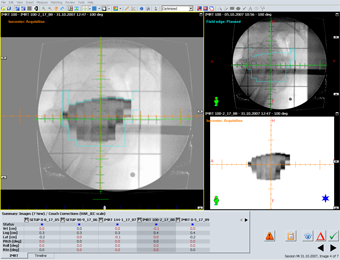
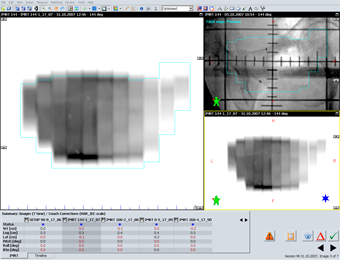
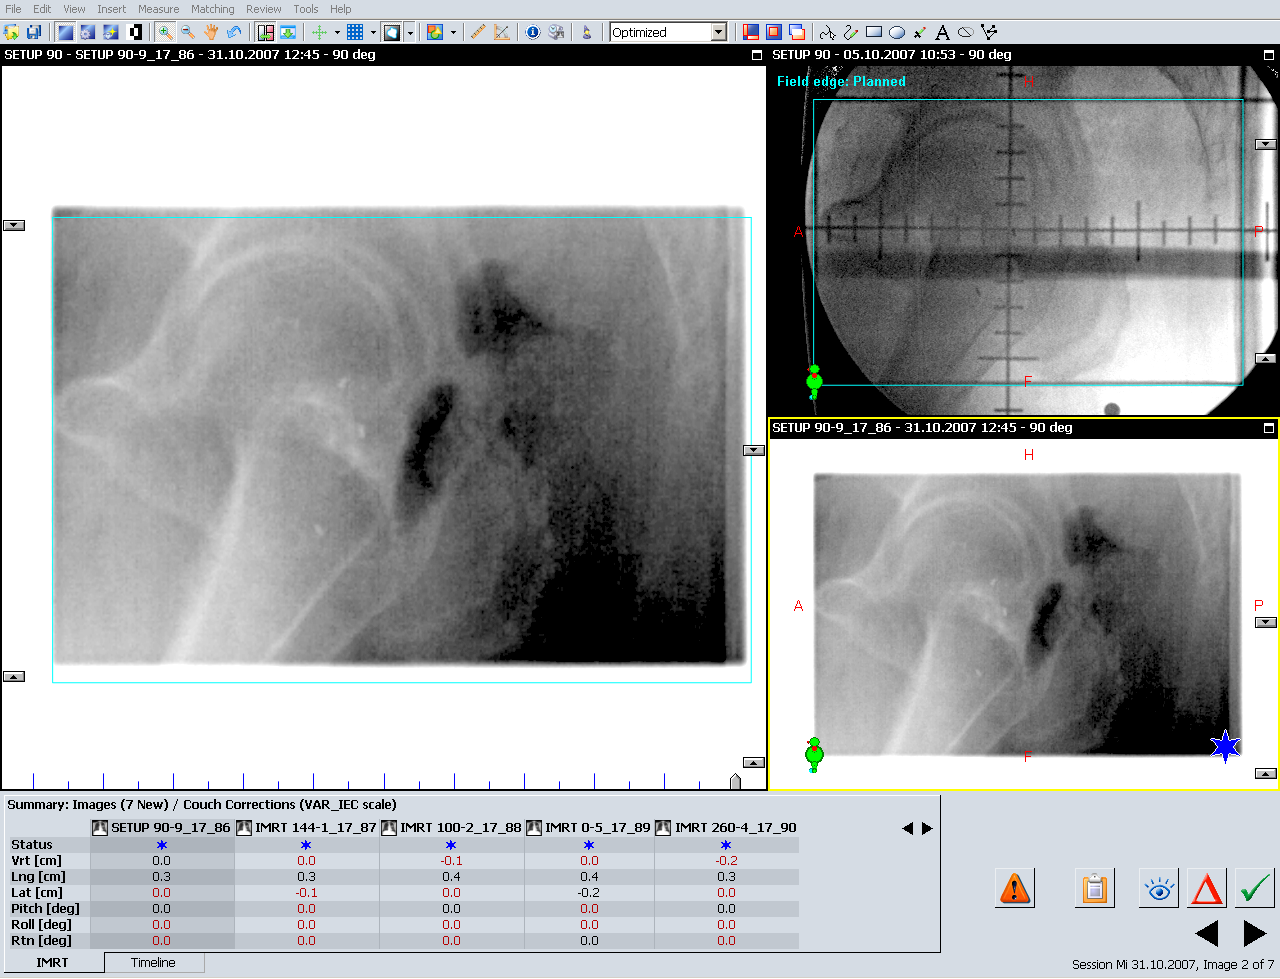
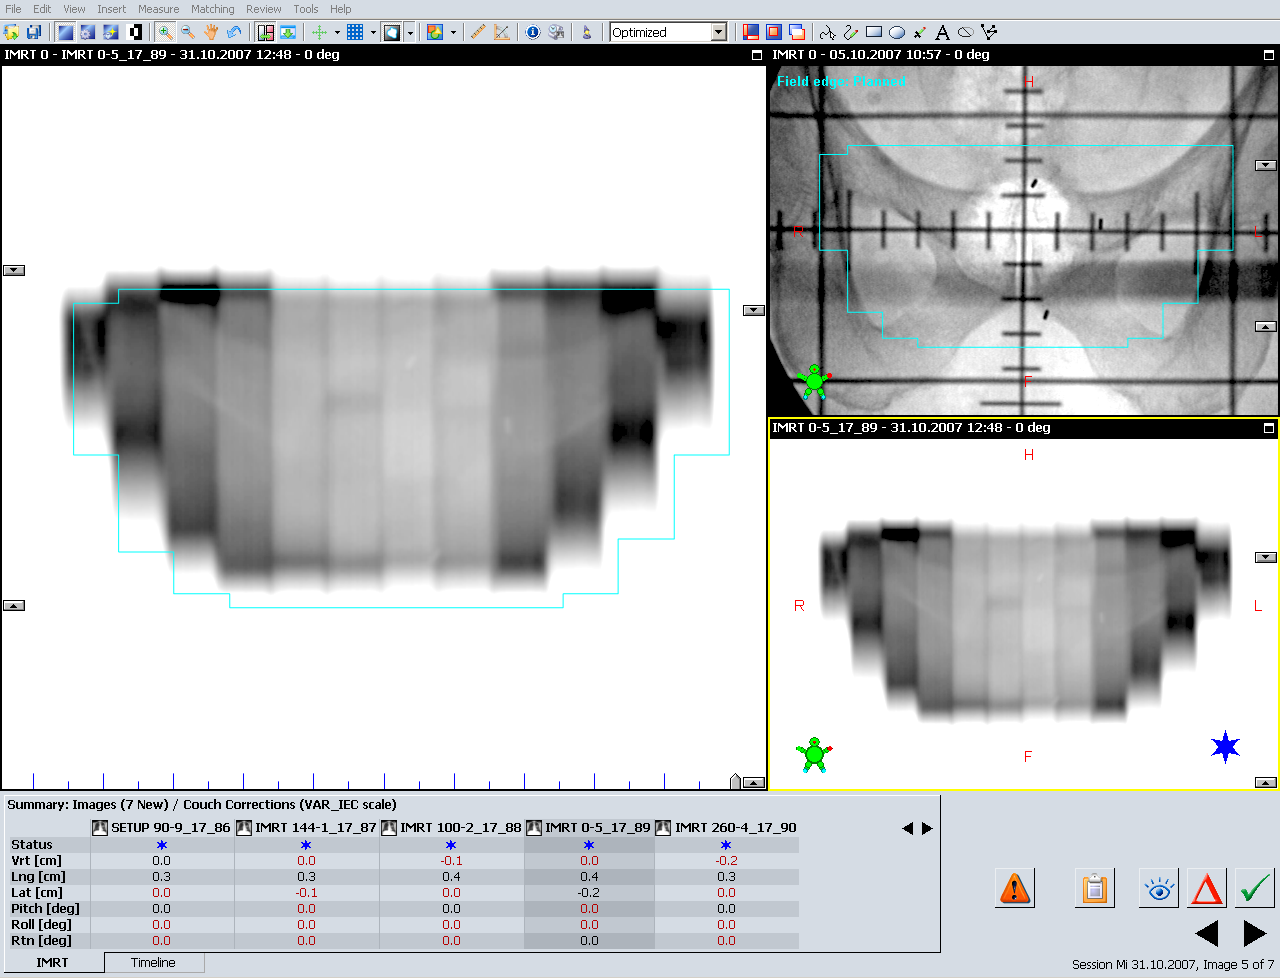
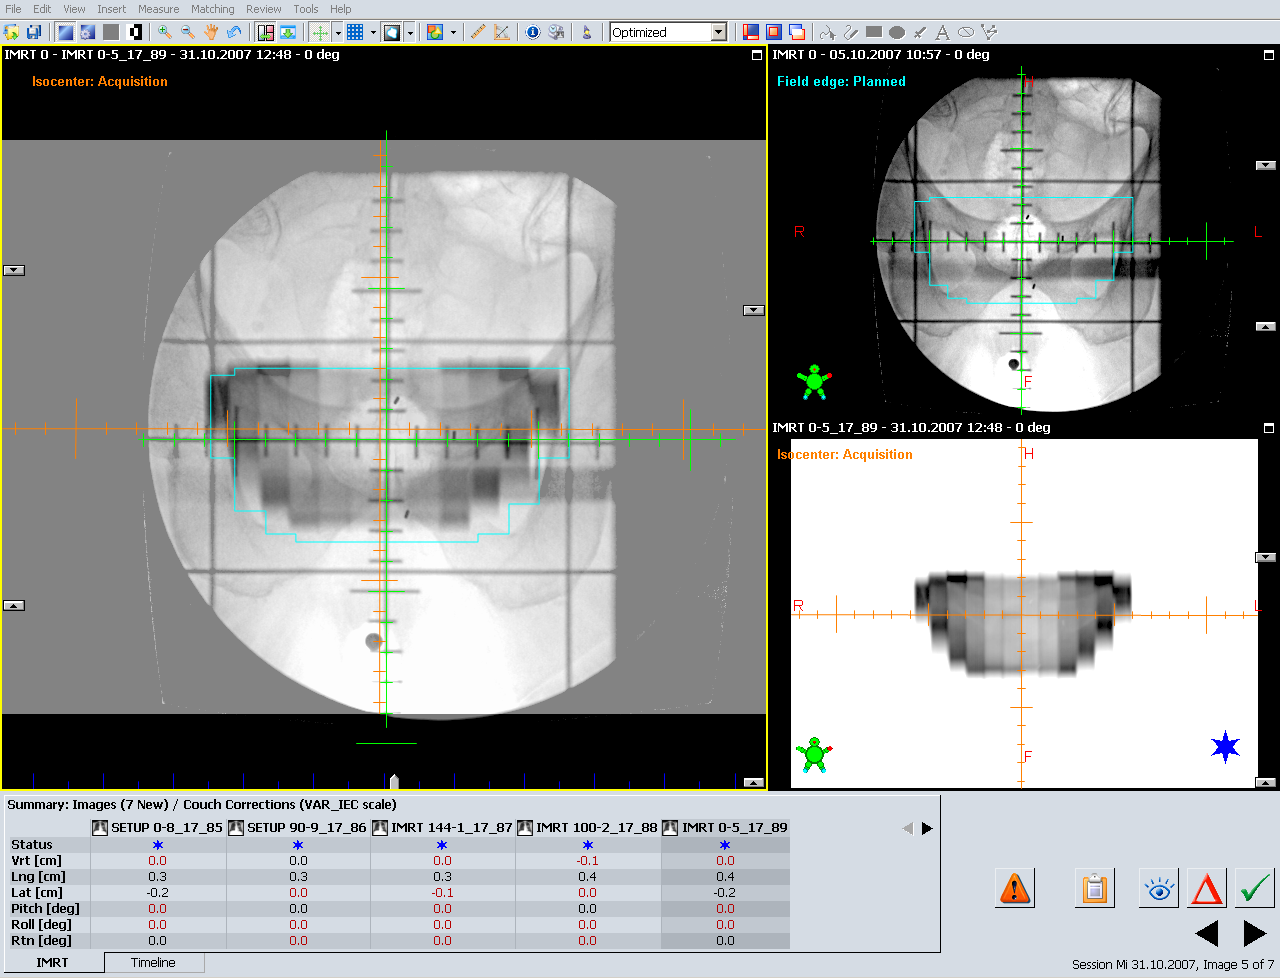
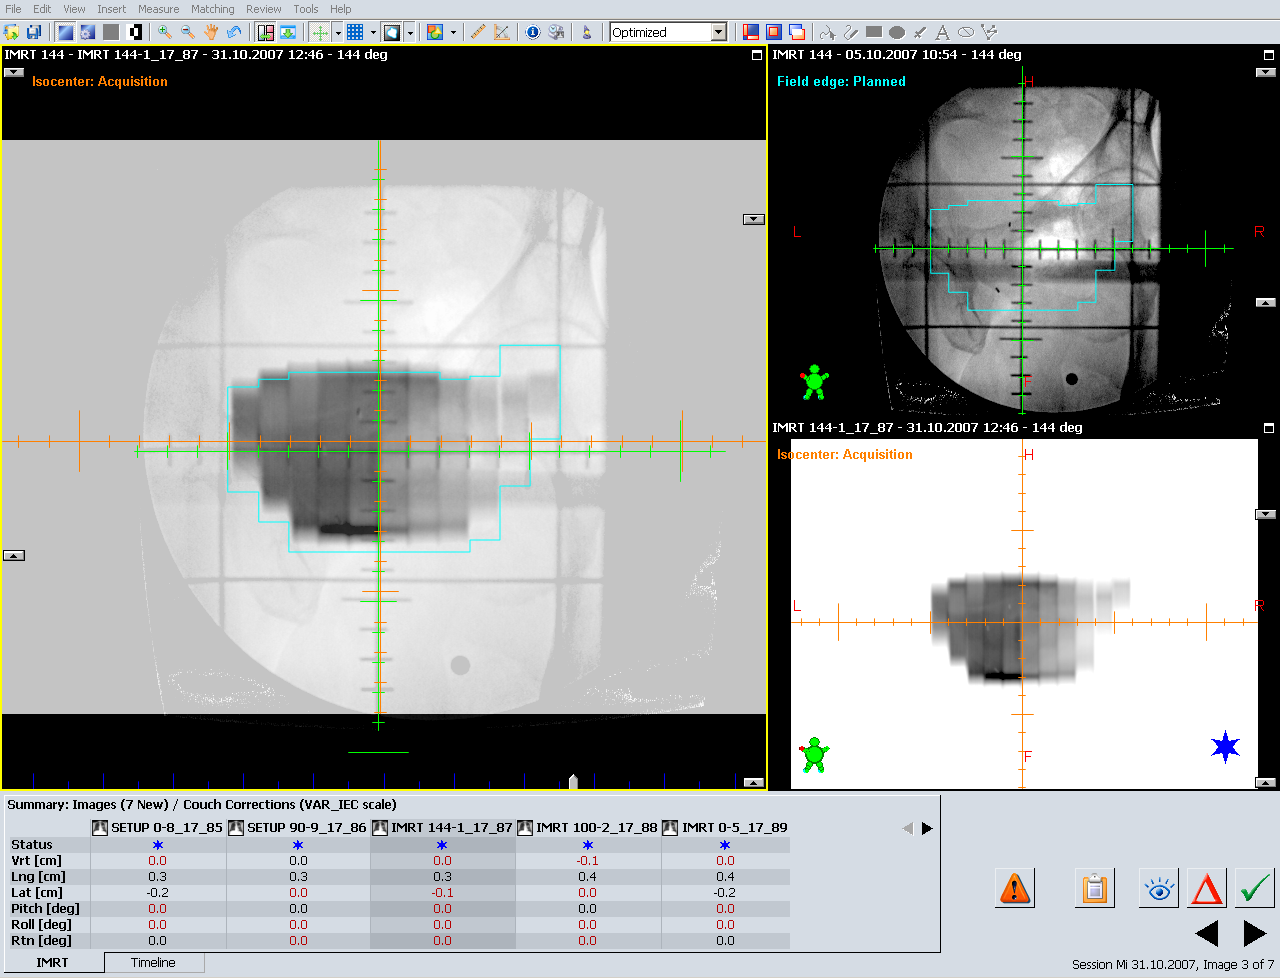
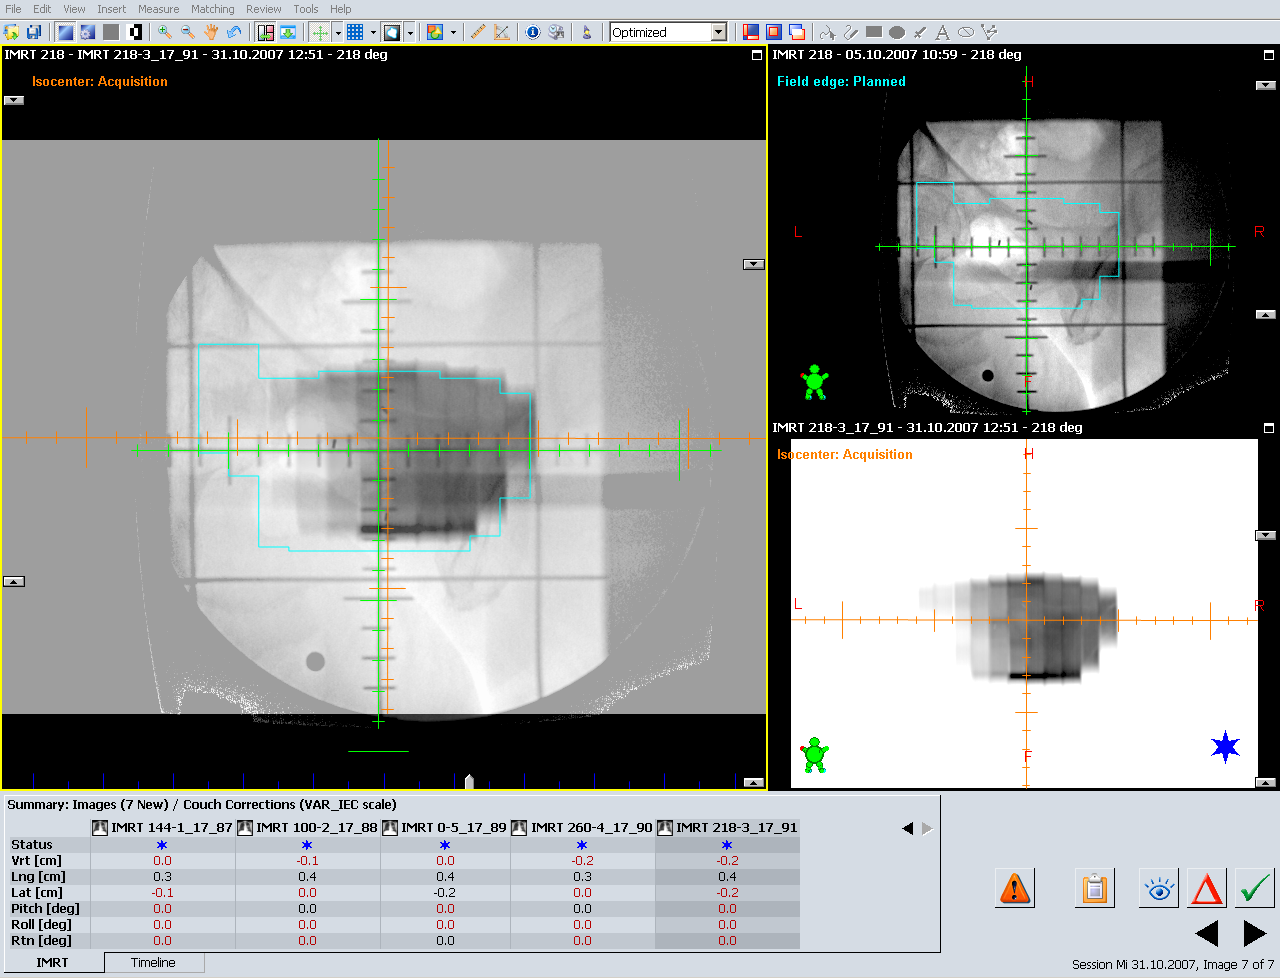
It is interesting to see that on nearly all IMRT fluence images acquired during sliding window treatments, the markers are visible as well. Therefore, even the IMRT fields can be matched to the respective reference images from simulation: |
 |
 |
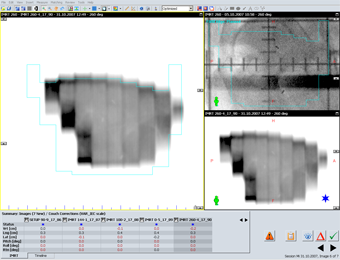
| A blend between the simulation image and the (inverted) fluence IMRT image is shown next. Note that the most caudal marker is matched, but not the other two. This was according to matching rules for this patient (the same rule applies to all other images shown here): |
|
| |
 |
 |
 |
 |
 |
 |
 |
 |
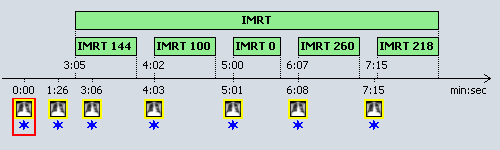
| Having clear rules speeds up the process. The whole IMRT treatment comfortably fits into a 10 minute time-slot on the linac, as the timeline for the above session shows: |
|
| Between the first setup image and the last integrated fluence image, 7 minutes and 15 seconds have passed. This is a typical value. What is missing here is the time for setting up the patient. But this will not take more than two more minutes. And keep in mind that after such sessions, we are quite confident that we have really treated the prostate, not the bones! |
| One reason why we have moved from bone matching to marker matching as quickly as possible is because we have seen that the prostate may move considerably between sessions. How large can the day-to-day movement of the prostate be? Go here for an extreme example. |
What is our conclusion regarding the different marker design? I can only comment on the markers we have tested in the patient: the Gold Soft Tissue Markers from Civco (MT-NW-887-812) and the Goldlock markers from Beampoint. Each company has arguments why their markers will not migrate inside the prostate tissue: Civco have their grooves, Beampoint has the star-shaped cross section (which results in a somewhat larger surface). Sorry I don't have any on stock, so I can't provide you a photo! But you might want to compare my own photo of the Civco marker on top of the page with the photo on the Civco web site: In reality, the marker seems to be less groovy ...
Anyhow, up to now we did not see any migration for both brands tested. And if their dimension would have been the same, the detectability on the port image would probably be the same as well. So maybe price and availability will make the difference ... |
