Eclipse: Preparing for a plan verification with EPIQA
A 5-field, 15MV prostate plan shall be verified with EPIQA in MIX mode, which means without any additional buildup on the EPID. The plan was calculated in Eclipse with AAA8614 and 2.5mm grid.
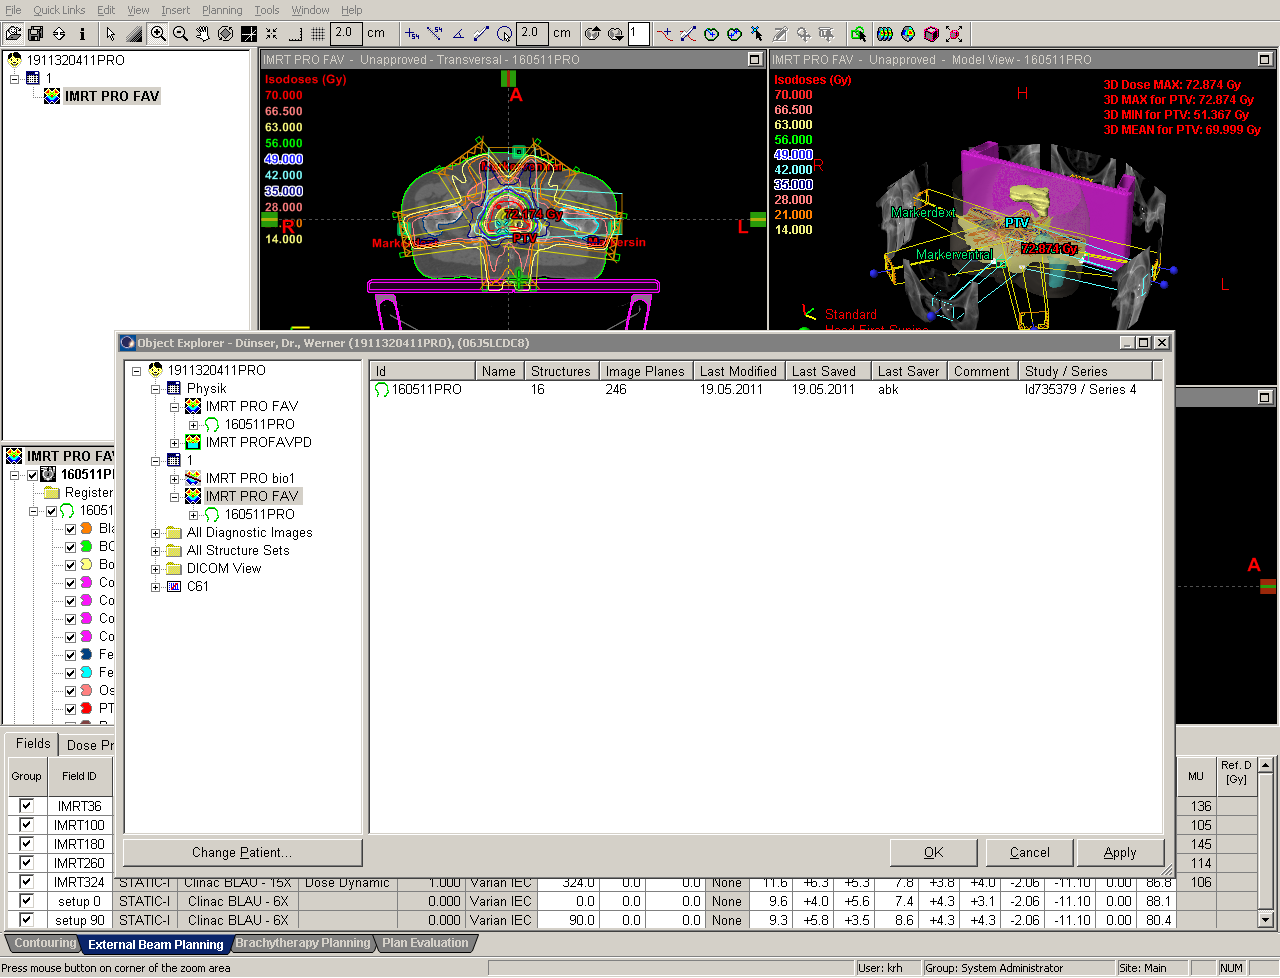
The Object explorer in Eclipse shows the situation at the beginning: in the clinical treatment course (Course 1), we have the plan which shall be verified. The Physics course contains a backup copy of the favourite plan (just in case ...):
Step 1: Creating the Eclipse dose matrices
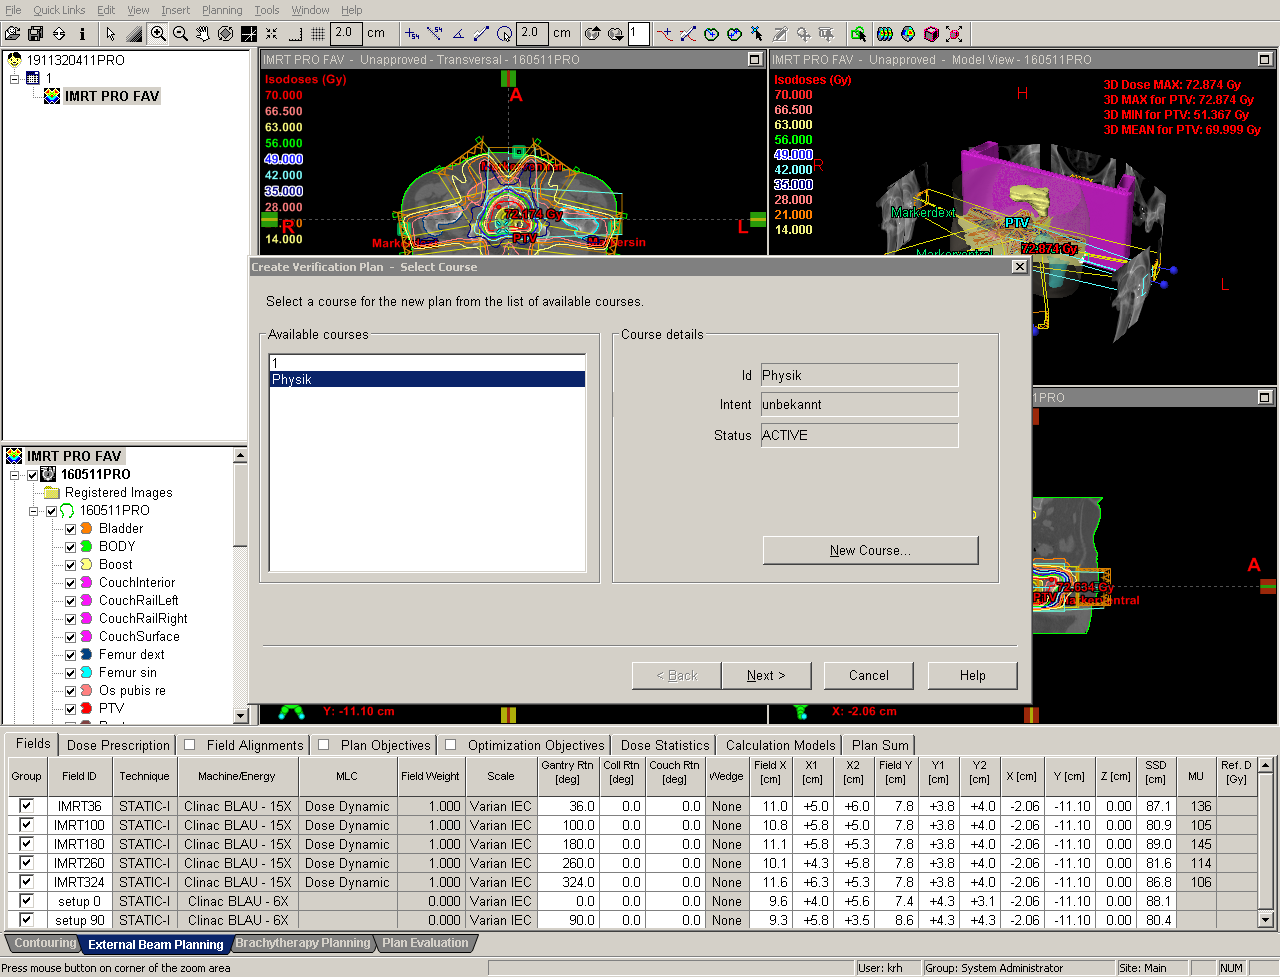
The verification process starts by selecting "Create verification plan" from the Planning menu. All verification plans will be saved to the Physics course, to have a clear separation of Physics plans from clinical plans (as soon as the plan verification is finished, the ststus of the Physics course will be set to "Completed":
An important step is the selection of the correct verification phantom. This is a separate "patient" holding different structure sets (water phantoms). The structure set we use here is called "WP (0,0) 15MV". The block of water starts 2 cm below image center. This structure set of the phantom (and the CT images) is imported to the active patient:
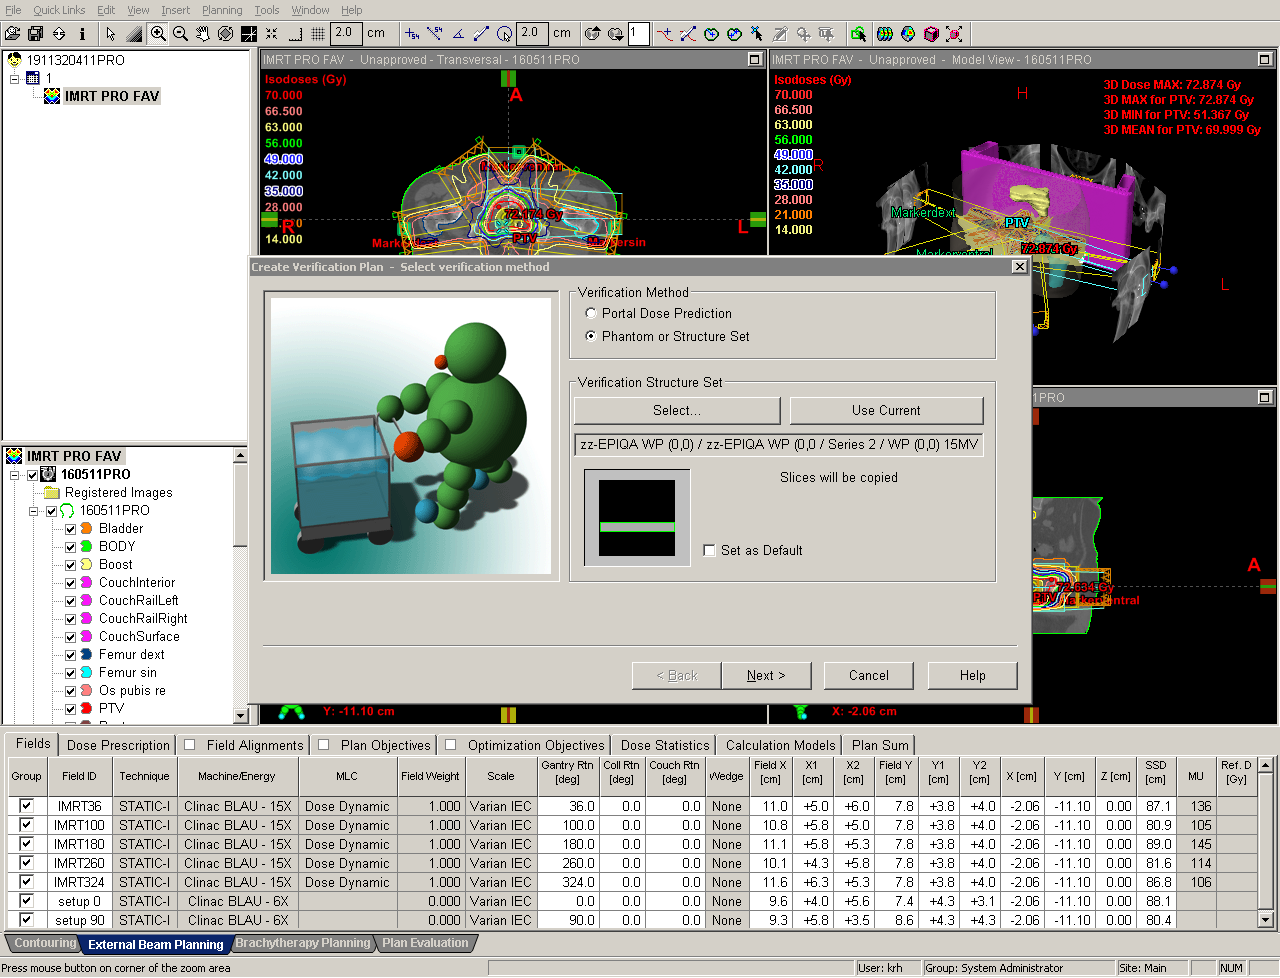
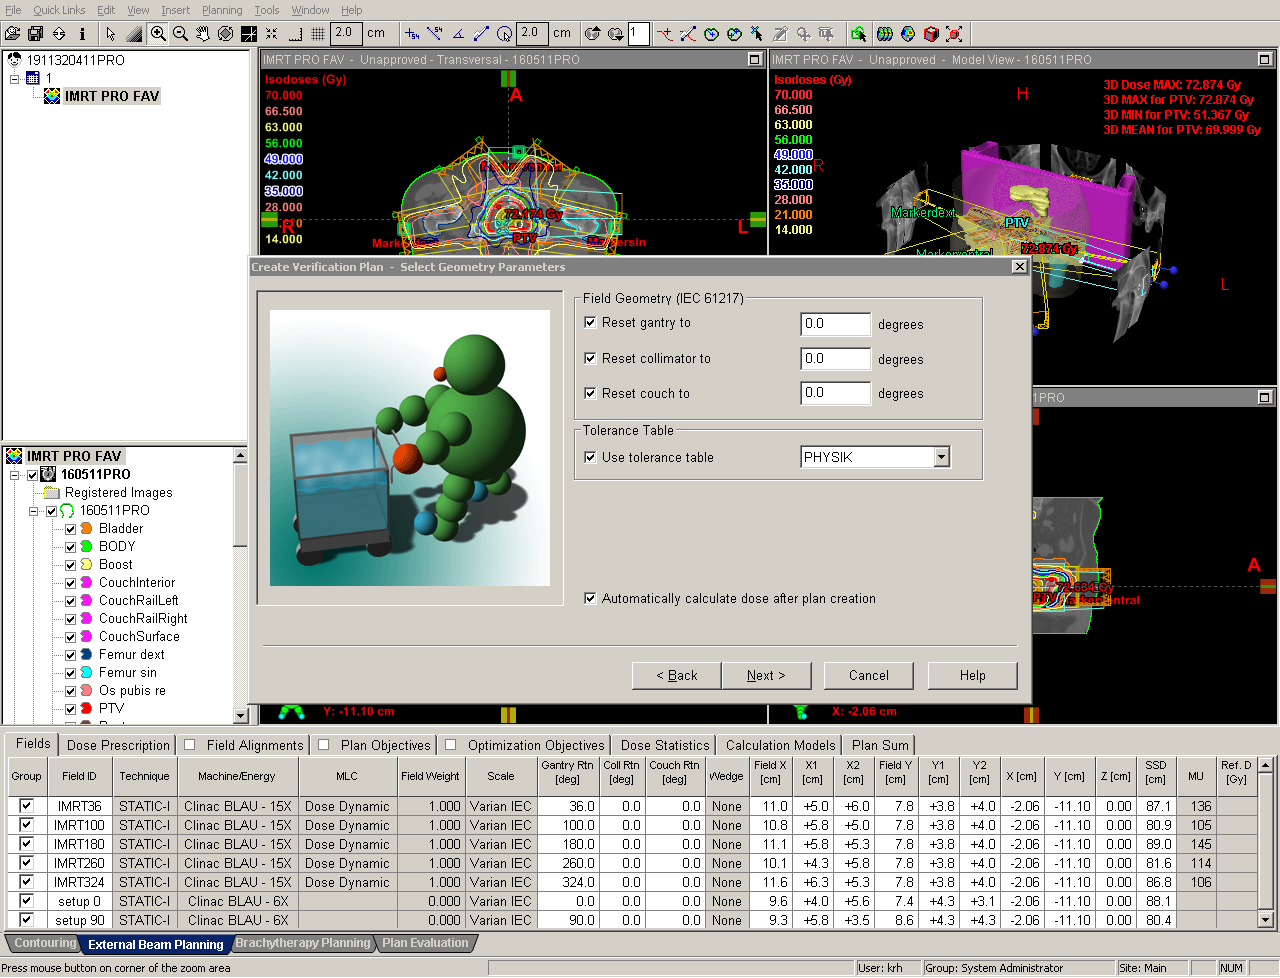
The string (0,0) in the structure set's name is a hint to the user that the verification phantom is set up for EPIQA's (0,0) geometry. Therefre in the next step of the wizard, all angles are reset to zero. In ARIA10, it is possible to set a flag which will start calculation for all verification plans as soon as they are created:
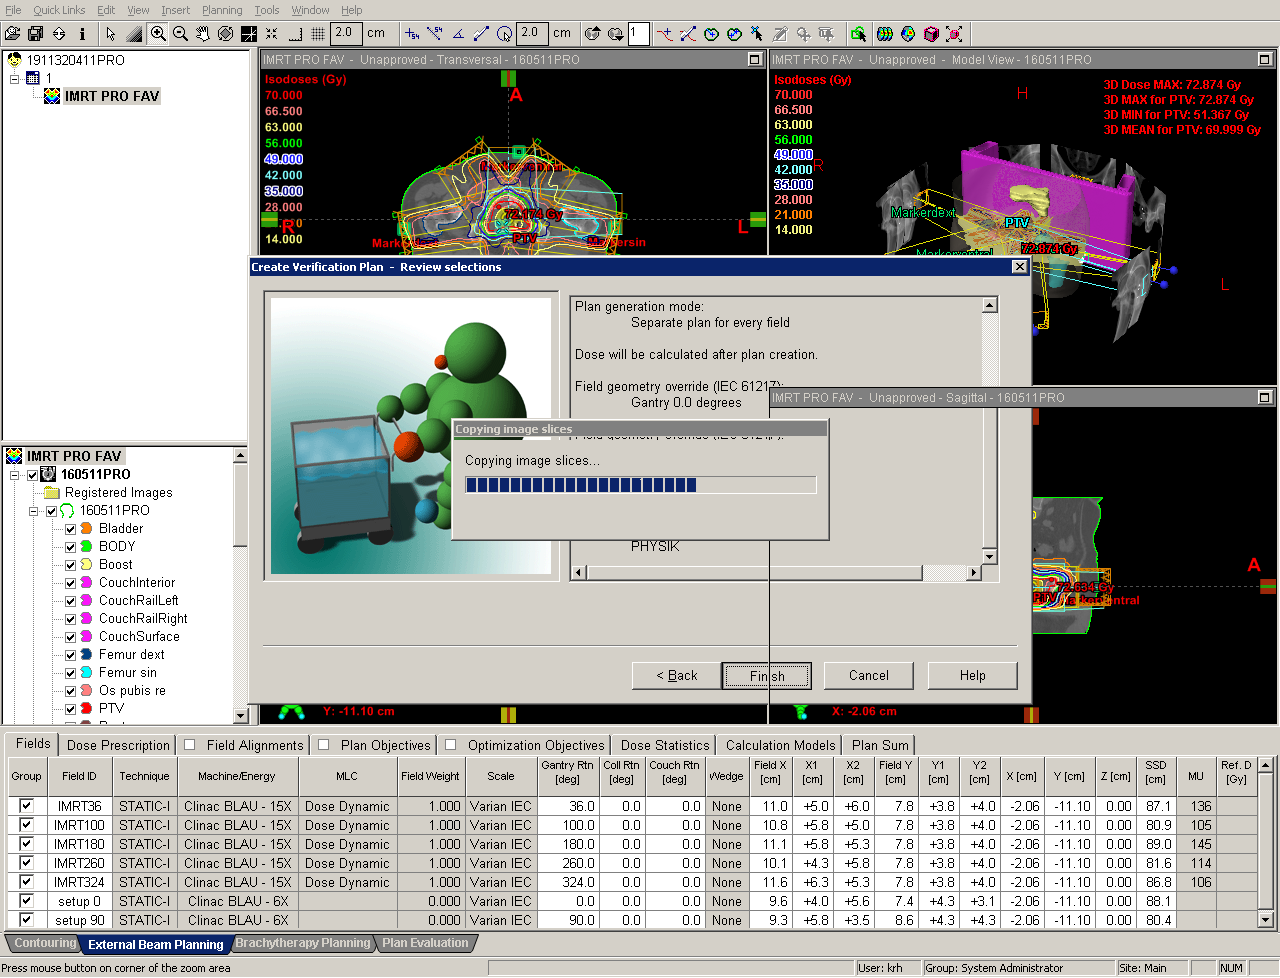
Since we want to calculate one dose distribution per field, all fields have to be put in separate plans. The plans that will be created now will provide us the planar Eclipse doses (later, we will create another verification plan with all fields):

Now the "Create verification plan" wizard is finished and Eclipse goes to work:
After plan generation (the physics course shows the five new plans), Eclipse proceeds with dose calculation, plan by plan:
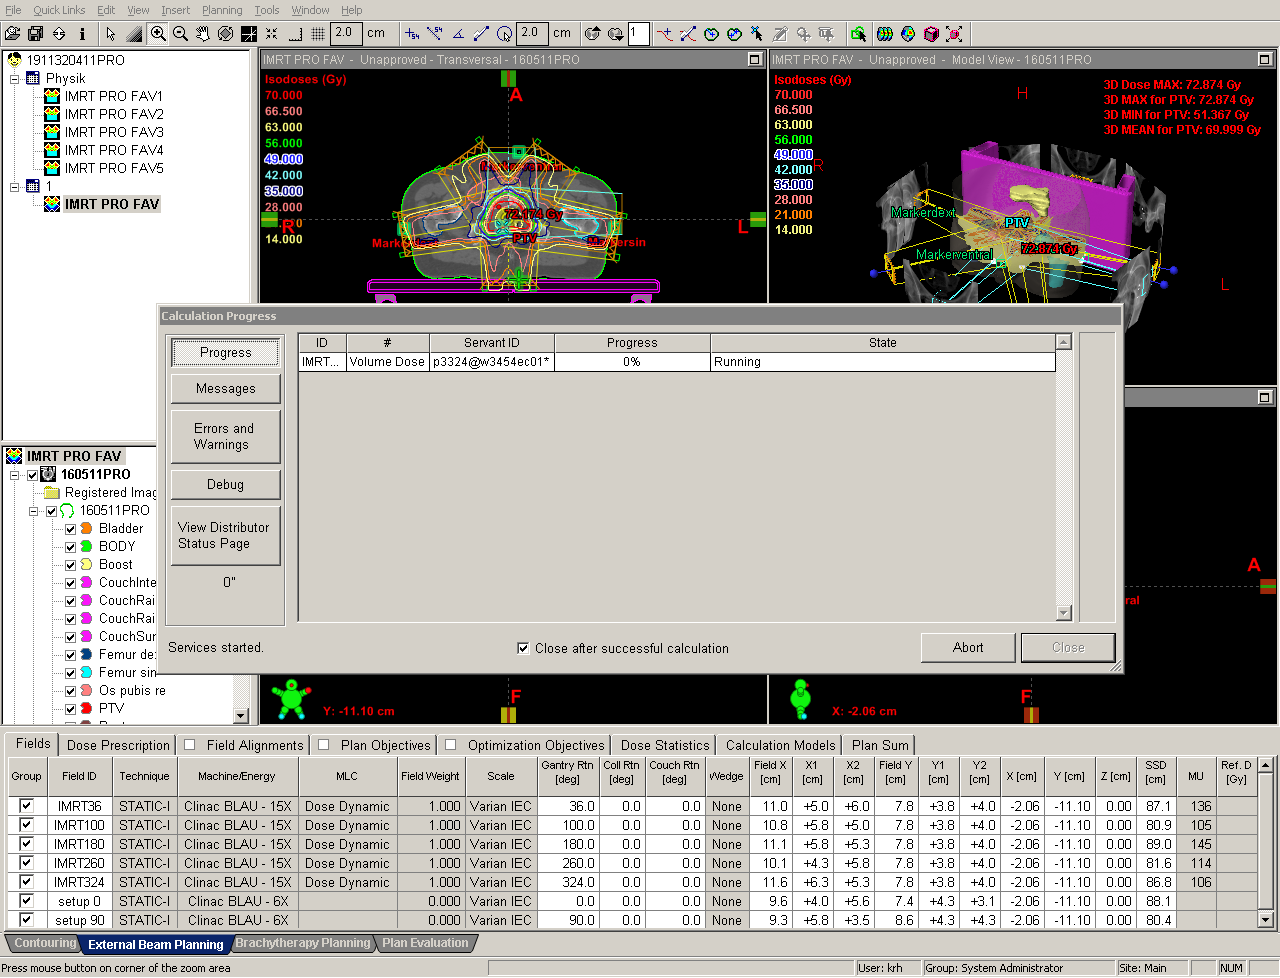
A minute later, all five plans are calculated:
Two minutes have passed since we started with the wizard.
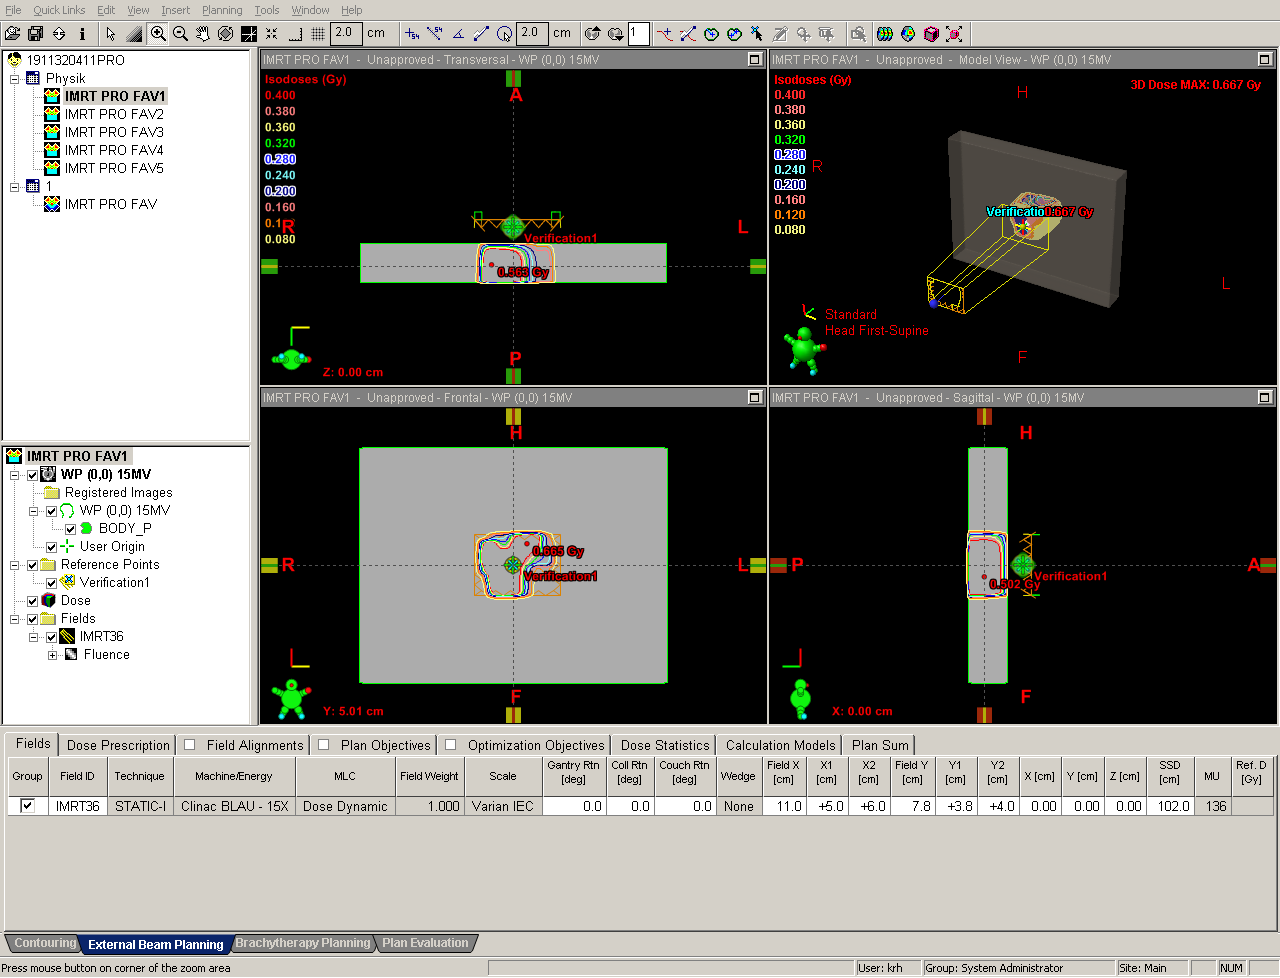
In the lower left window, we have to scroll to the plane at 3 cm phantom depth, since this is the depth we calibrated EPIQA for 15 MV. Y is 5 cm, as calculated from isocenter. SSD is 102 cm, because for the aS500/R-Arm combination, source to measurement distance is 105 cm.

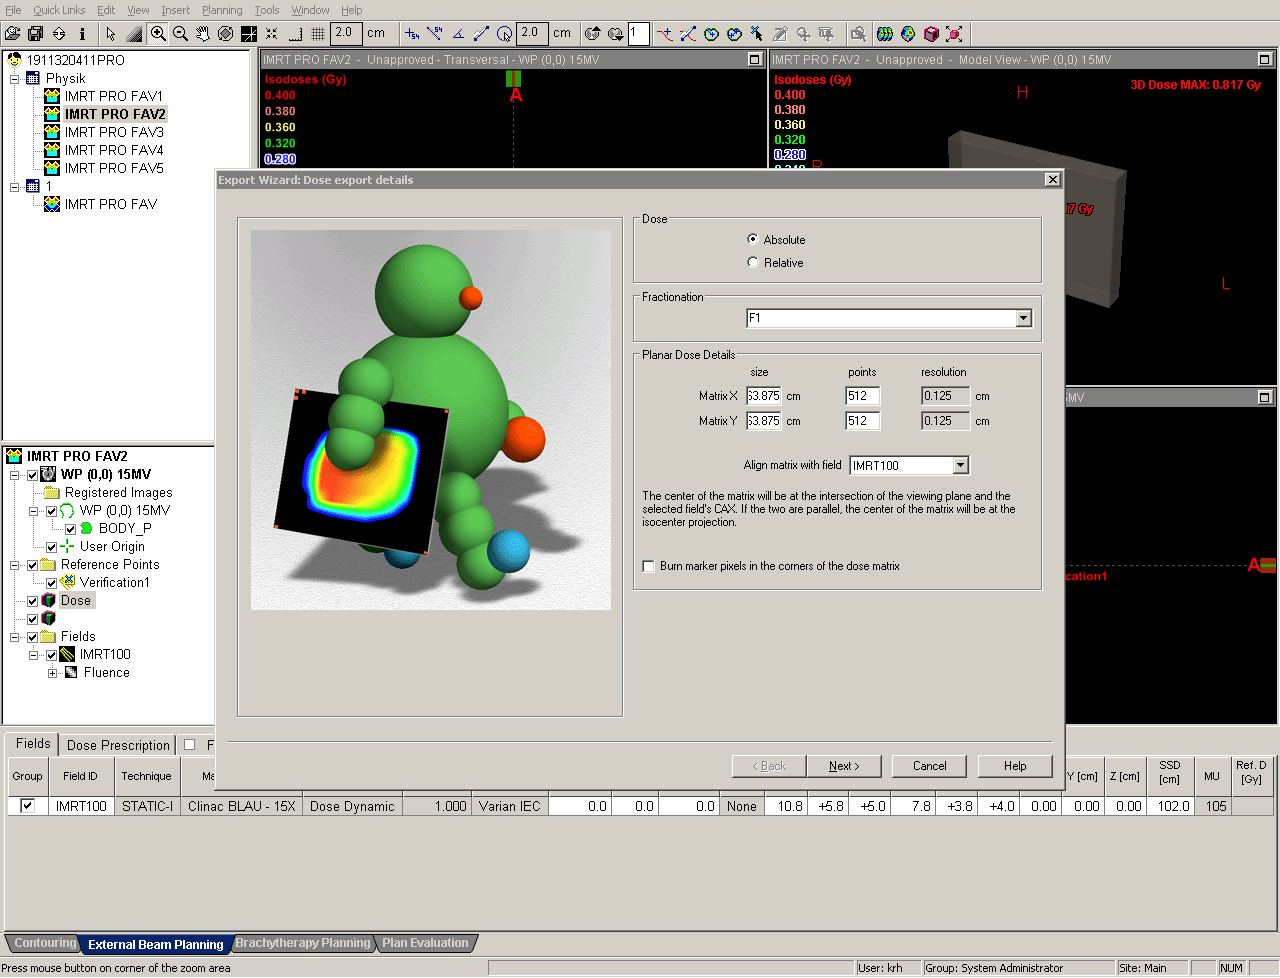
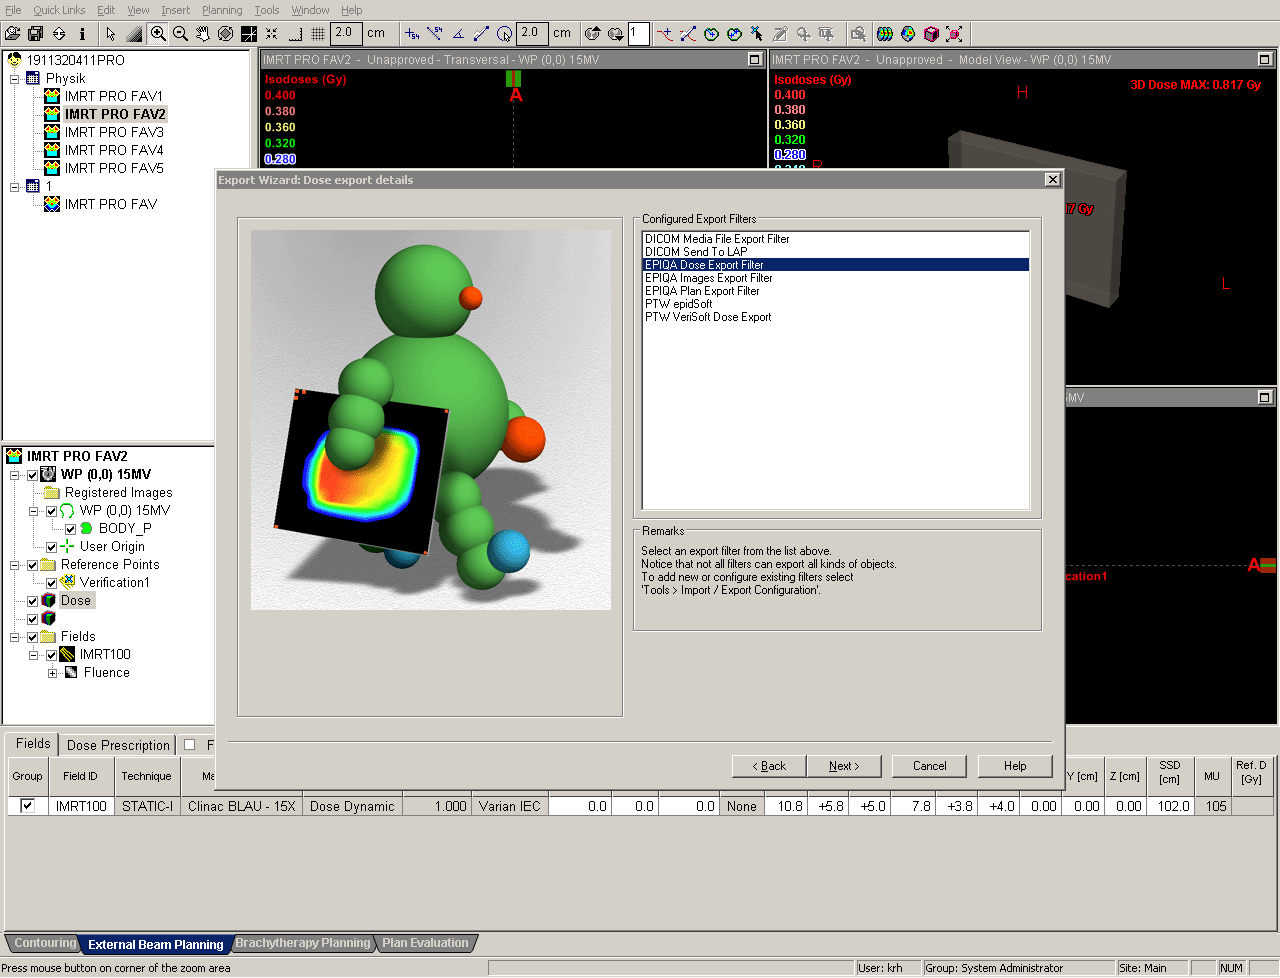
Planar dose matrices have to be exported with fixed size: 63.875 x 63.875 cm and 512 x 512 px. This gives a quadratic pixel size of 0.125 cm. This is the only idiotic step which has to be repeated for every field (Eclipse unfortunately does not remember the settings from one export to the next ...):
Three different export filters should be defined for EPIQA, pointing to different target directories. Now we use the dose export filter:
We change the endings of the file names: -1, -2 and so on:
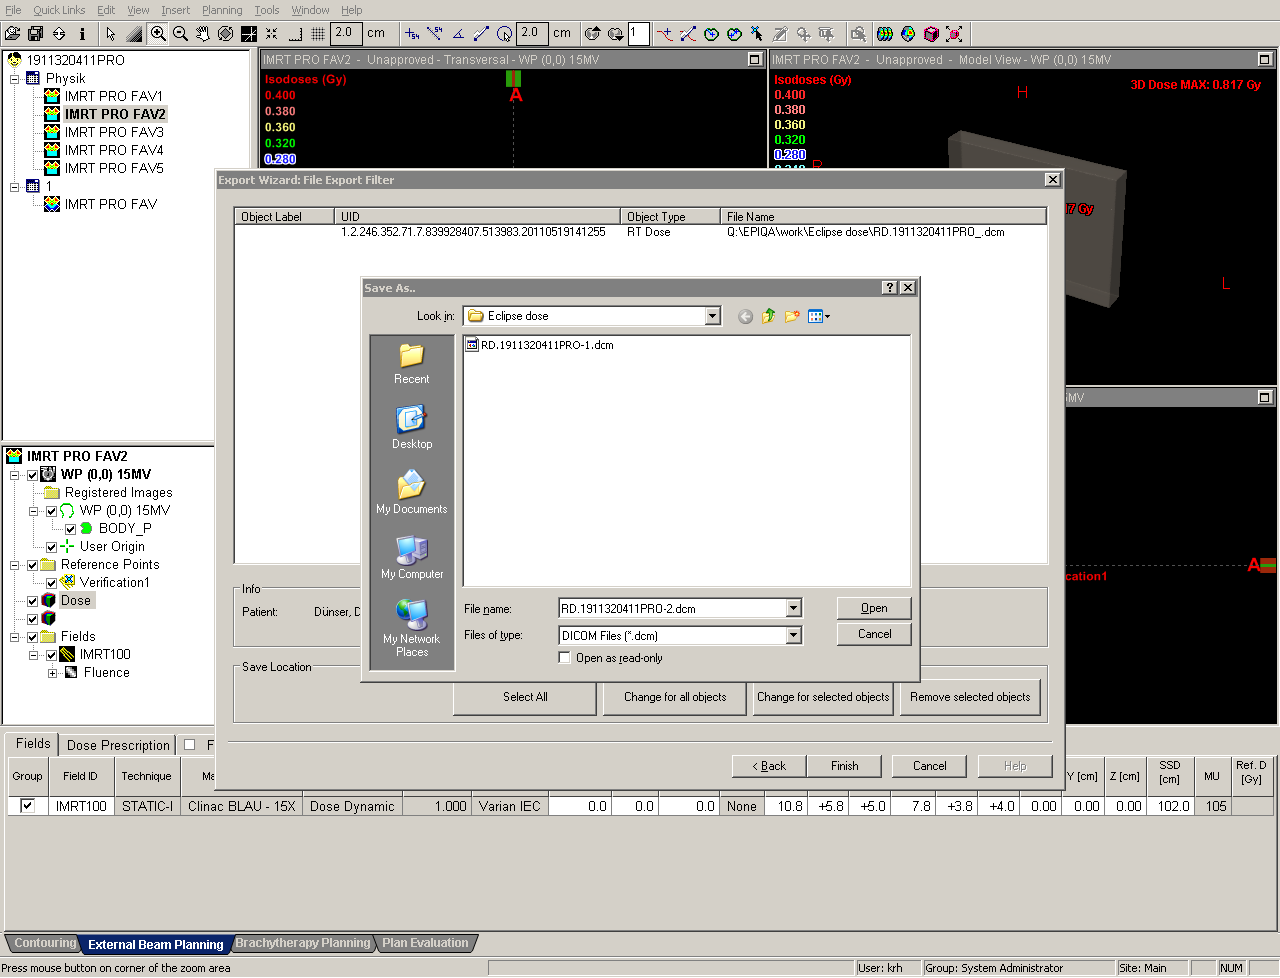
Alltogether we generated five dose matrices.
Step 2: Creating the measurement plan
Now we have to create a second verification plan, which will be treated on the linac. It's purpose is to measure the EPID images.
We load once more the clinical plan and say "Create verification plan". This time we select "Place all fields into the same verification plan":
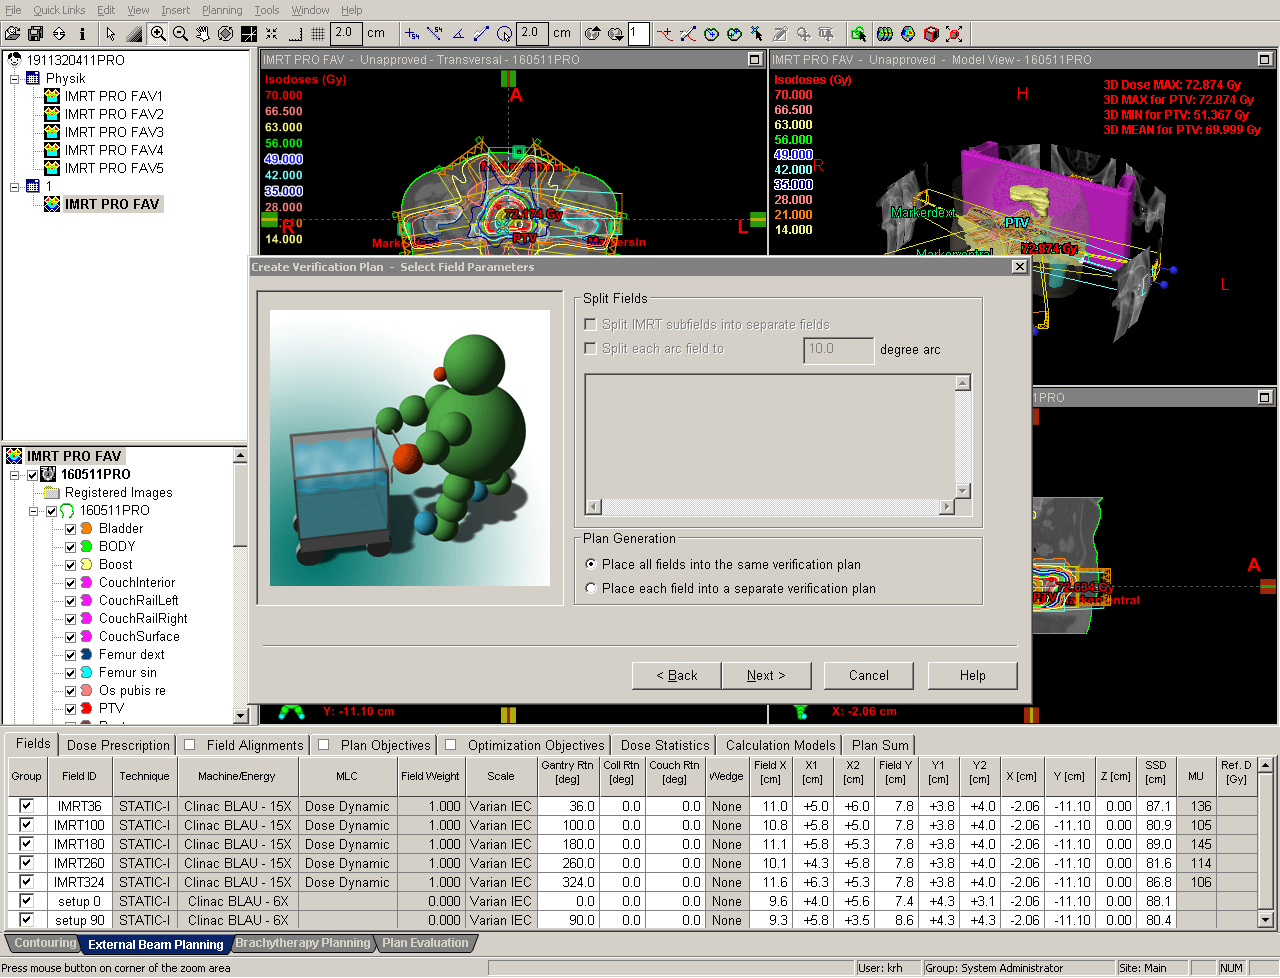
The final measurement plan (we give it the ending TRT for treatment):
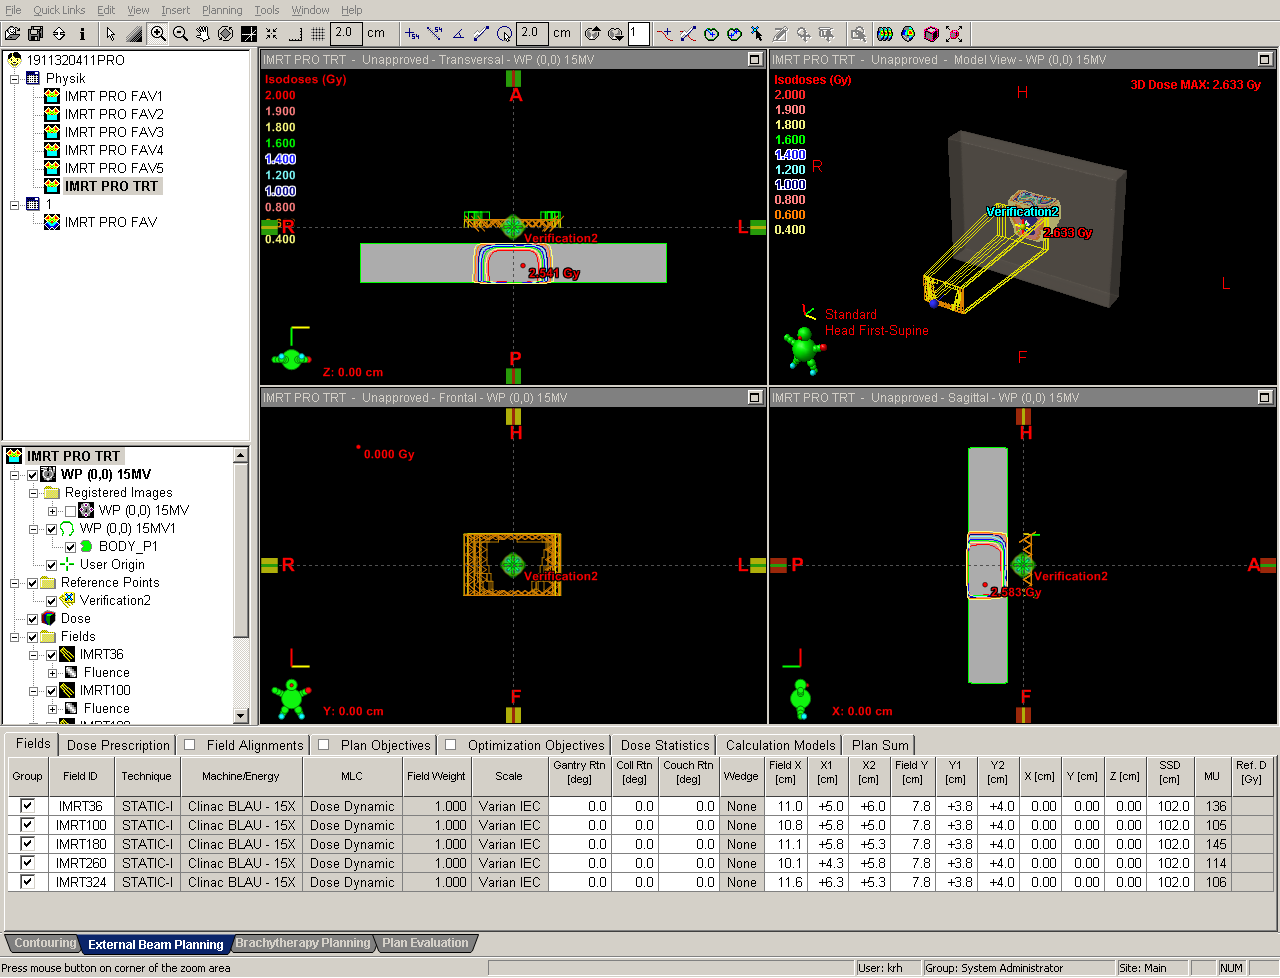
It is possible to change the number of fractions from 1 to 2 (just in case some interlock occurs during delivery, making one image useless).
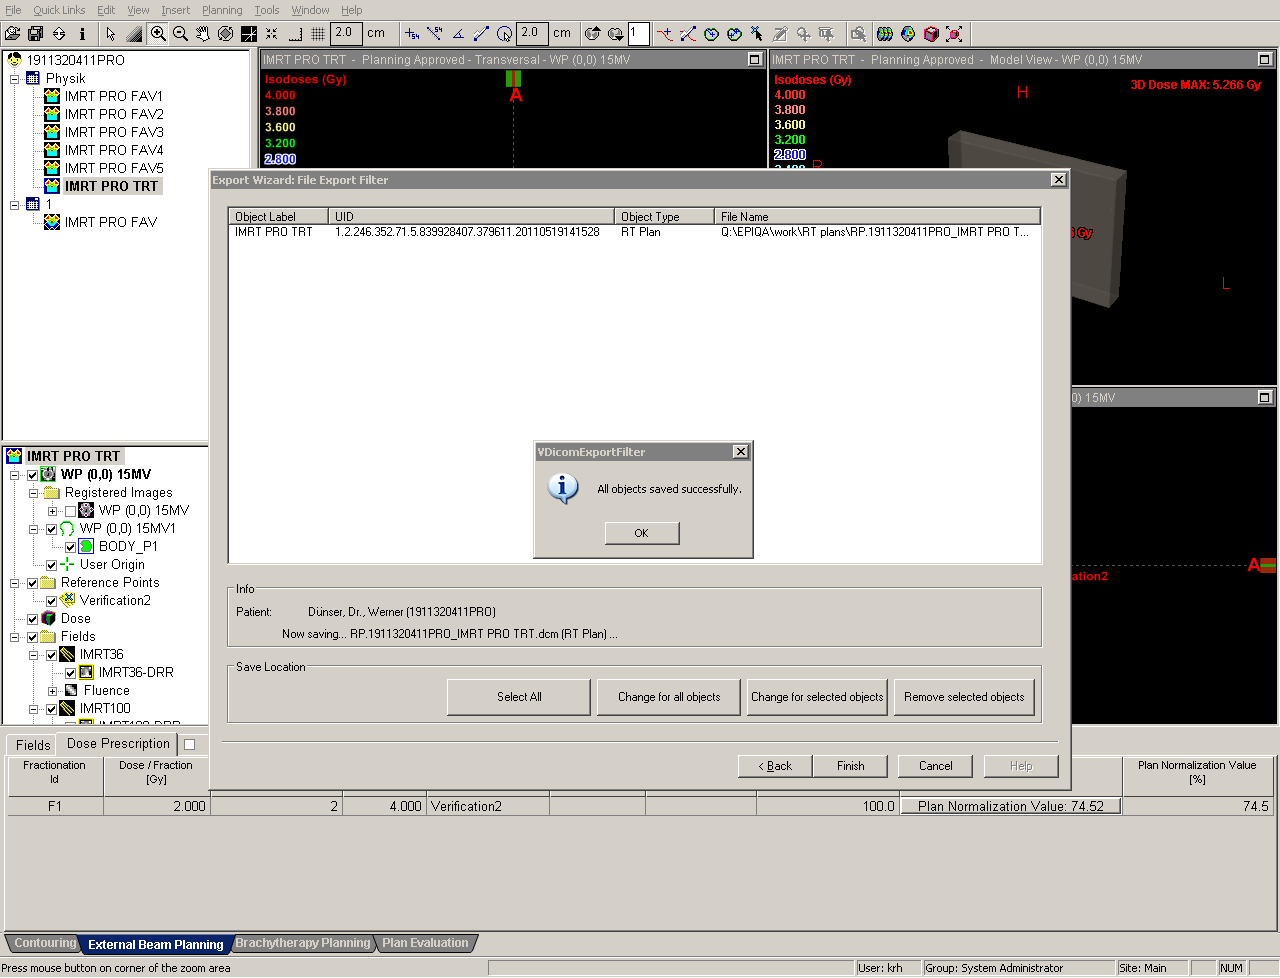
After "Planning approval", the plan has to be exported with the "EPIQA plan export filter":
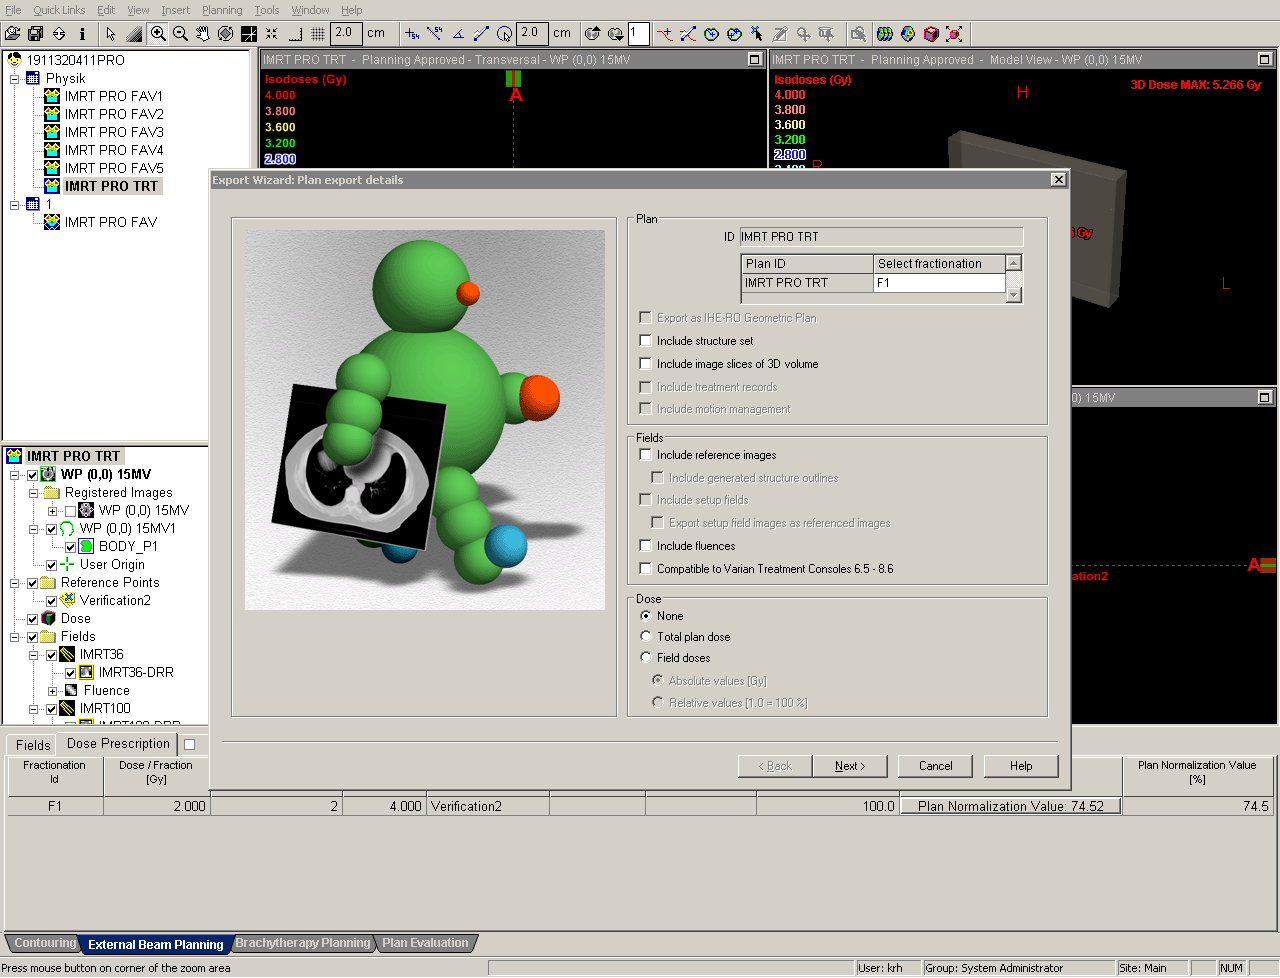
The plan file is the only file that is actively loaded in EPIQA when the evaluation is started.
This was the last preparation step in Eclipse. The delivery plan has to be finalized in RT Chart, by scheduling the plan and adding Sequence images. in Time Planner, the patient is given an appointment on the linac, and checked in. Then the plan can be delivered on the machine.