The Medical Physics group at KFJ is continuously trying to optimize its QA processes. Everybody who is personally involved in the regular pattern of constancy checks is trying to complete his task as quickly and as accurately as possible.
This is the reason why we looked for a smarter way to determine certain mechanical parameters like Gantry angle, Collimator angle and Couch deflection, which are parameters that have to be checked on a regular basis as required by our national standards. Usually, spirit levels (or bubble levels) are used for this purpose. They have an air bubble inside a tube which is filled with liquid.
Spirit levels have the disadvantage that they can only detetect the "levelness" (when the bubble is in the center), but not the exact angle.
Similar problems sometimes arise during acceptance testing, commissionning or calibration. Thinking of robotic linac couchtops (e.g., the BrainLab robotic couch): how would you check whether a displayed roll or pitch angle of 2.35° is really 2.35° (and not 2.45°)?
This is why we investigated electronic clinometers.
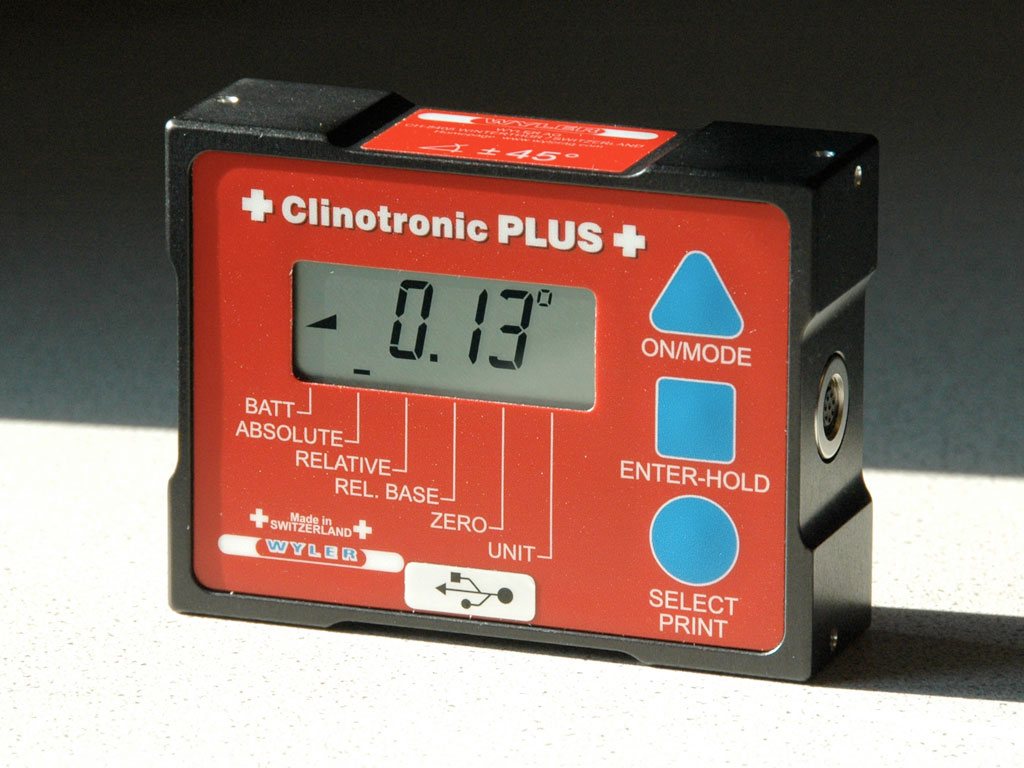
The Clinotronic PLUS
The Clinotronic PLUS (Wyler AG, Switzerland) is a small device (100 x 75 x 30 mm) with a weight of 500 g. It can be used to measure angles in the range of ± 45 degrees. Since all four edges of the housing can be used, angles up to 360° can be measured. The Clinotronic PLUS is therefore perfectly suited for calibrating the Gantry or the Collimator of a linac. Of course, if external surfaces of a machine are taken as surrogate for inner structures (the jaws are defining the Collimator rotation!), it has to be checked first that the outer surface can indeed be used as a surrogate. In case of doubt, ask your linac vendor!
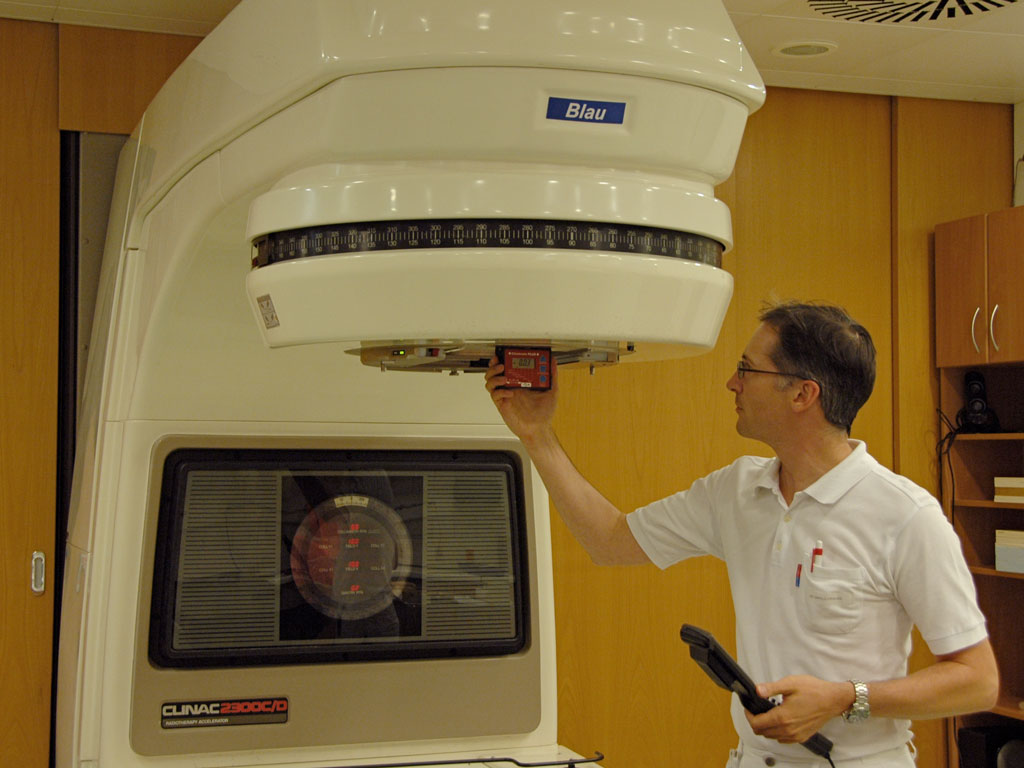
Calibrating the Gantry of a Varian Clinac
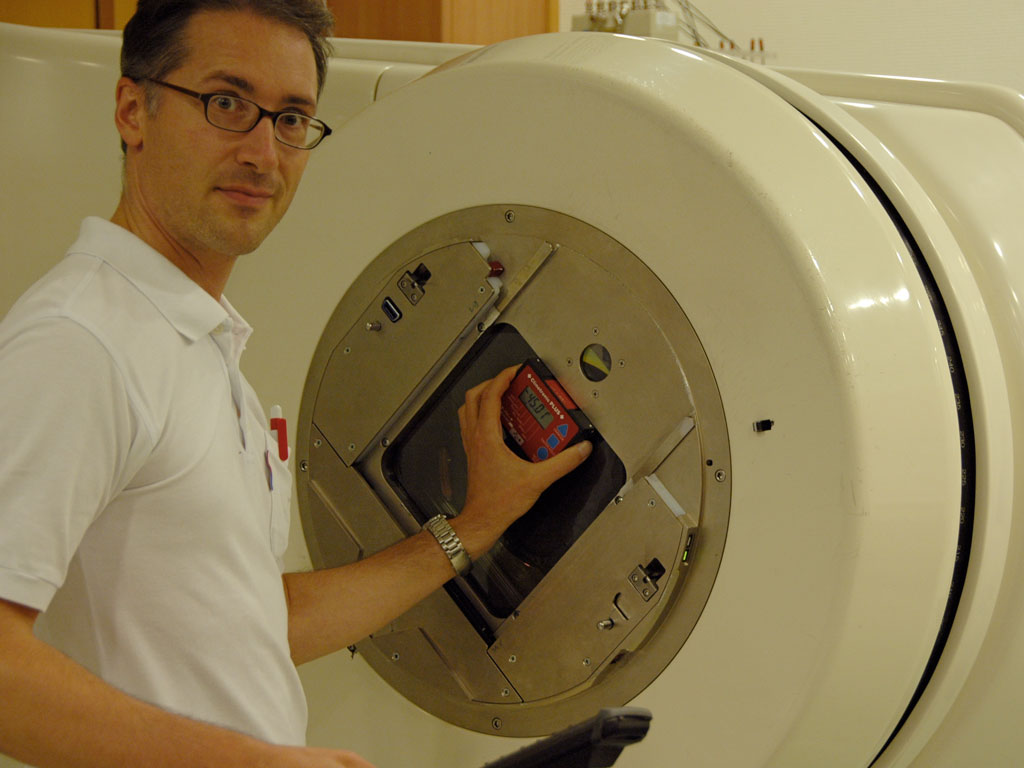
To calibrate the Gantry readout of our old Clinac 2300C/D, one has to go to the true Gantry angles of 180°, 90°, 0°, 270°, 180° in counterclockwise direction. At these positions, the raw readout values are captured in service mode. The true Gantry angles can only be set using an external device. The central part of the metal plate where the hard wedges are inserted is generally considered as a good surrogate for Gantry angle.
Calibrating the Gantry readout is simple:
- On the Clinac computer, go to service mode.
- In service mode, go to the Calibration menu or press C.
- In the Calibrate menu, choose Analog Scaling (A).
- Choose Readout Calibration (R).
- Choose Gantry Rtn (3). Enter the treatment room.
- Using the handpendant, go to the first Gantry angle (180°).
- If the clinometer shows the correct angle, use the handpendant to capture the readout value and go to the next line on the inroom monitor.
- For angles other than 180°, I usually press the clinometer gently against the collimator plate with one hand and rotate the Gantry using the handpendant in the other hand.
- When the five required values are captured, press End to keep data and save to save data to disk.
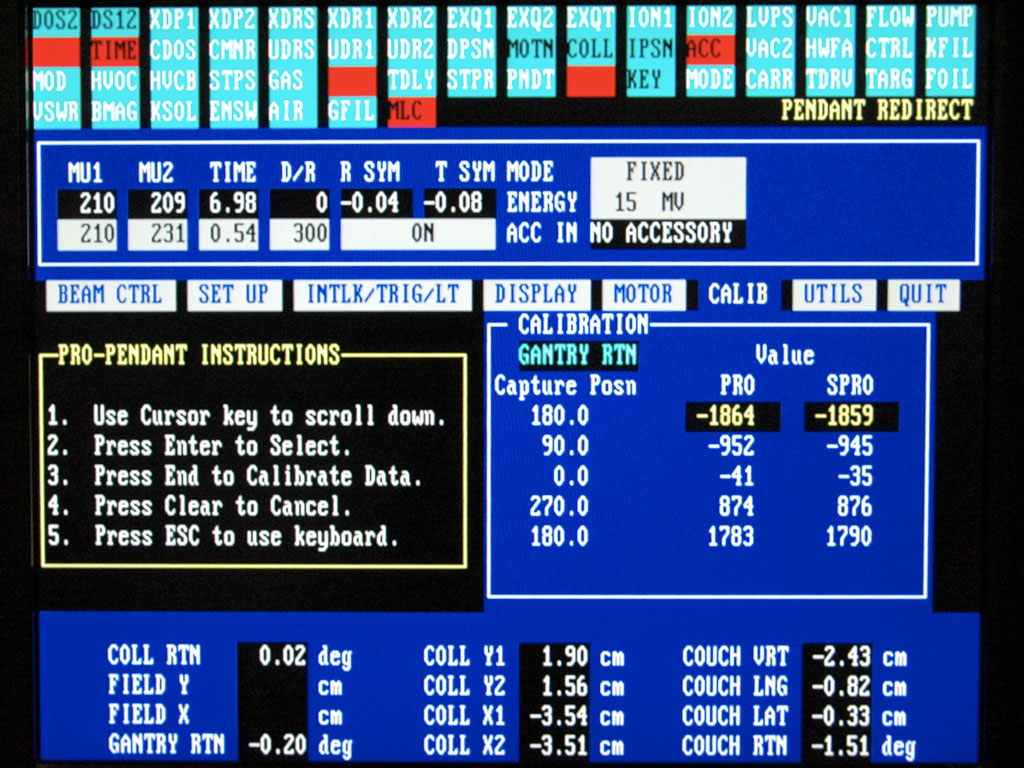
In Clinac Service Mode, the relevant screens look like this:
 |
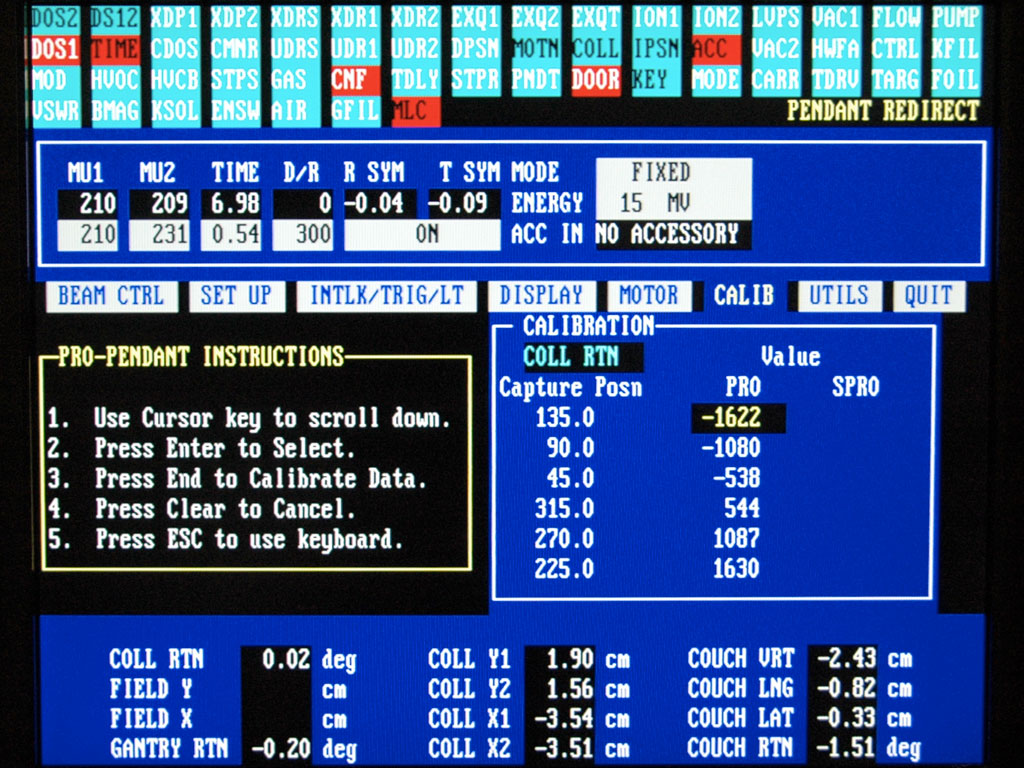 |
| Capturing Gantry values. | Capturing Collimator values. |
Calibrating the Collimator Rotation
Varian Field Service Engineers usually use ruler paper to calibrate the Collimator readout. The paper is taped down on the treatment couch. By using the light field at Gantry 0° and rotating the Collimator to certain capture positions, the readout is calibrated. The problem with this procedure is that the Collimator first has to be rotated to an absolute value (like true Coll = 0°), so that the ruler paper can be taped down correctly in relation to the crosshairs of the light field or the shadow of the jaws. If this is forgotten, the Collimator readout values will have a rotational offset after calibration.
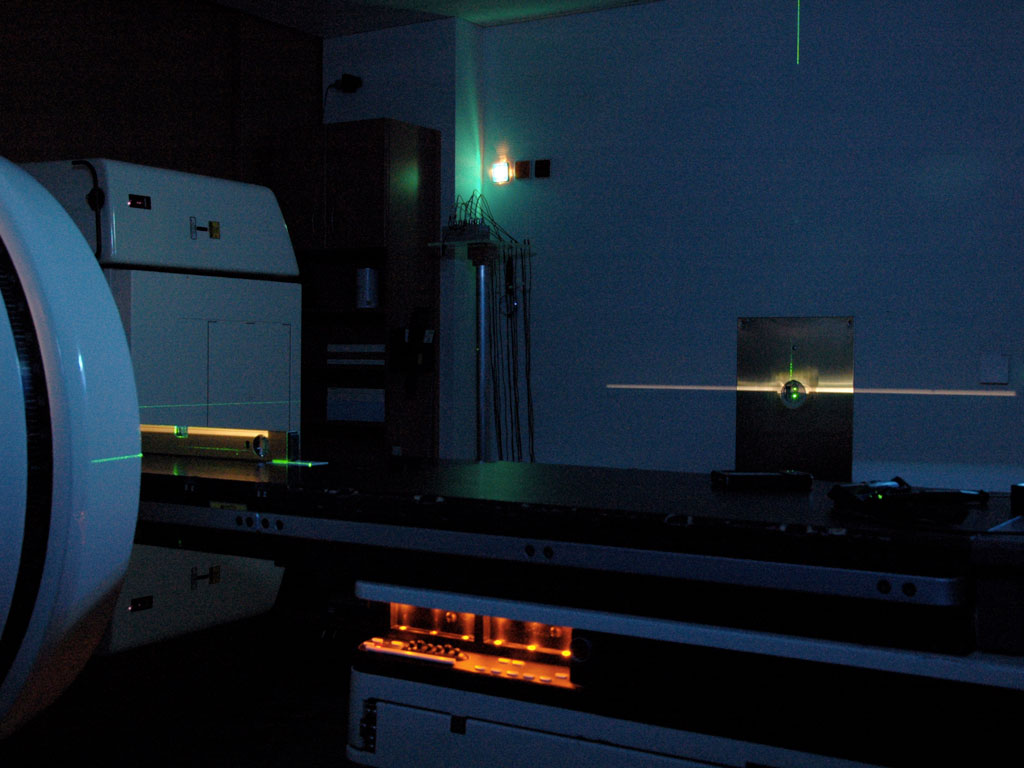
To overcome this problem, Field Service Engineers usually first rotate the Gantry to 90° or 270°, close the X-jaws to a narrow gap, open Y-jaws to 40 cm and set up a spirit level inplane on the treatment couch. The spirit level must be perfectly level. Then the room is darkened and the treatment couch is raised until the spirit level partly blocks the narrow light field, which can be watched on the side wall. The upper edge of the light field on the wall is now coming from one of the X-jaws (X1 if the Gantry is at 90°), the lower edge is coming from the spirit level. By rotating the Collimator only slightly, the light field can be made equally wide over the full length. Then the Collimator is said to be at its true target value. The Gantry is rotated back to 0° and the ruler paper is aligned to the light field and taped down. Now the calibration procedure can begin.
From this lengthy description it is clear that the procedure can be improved.
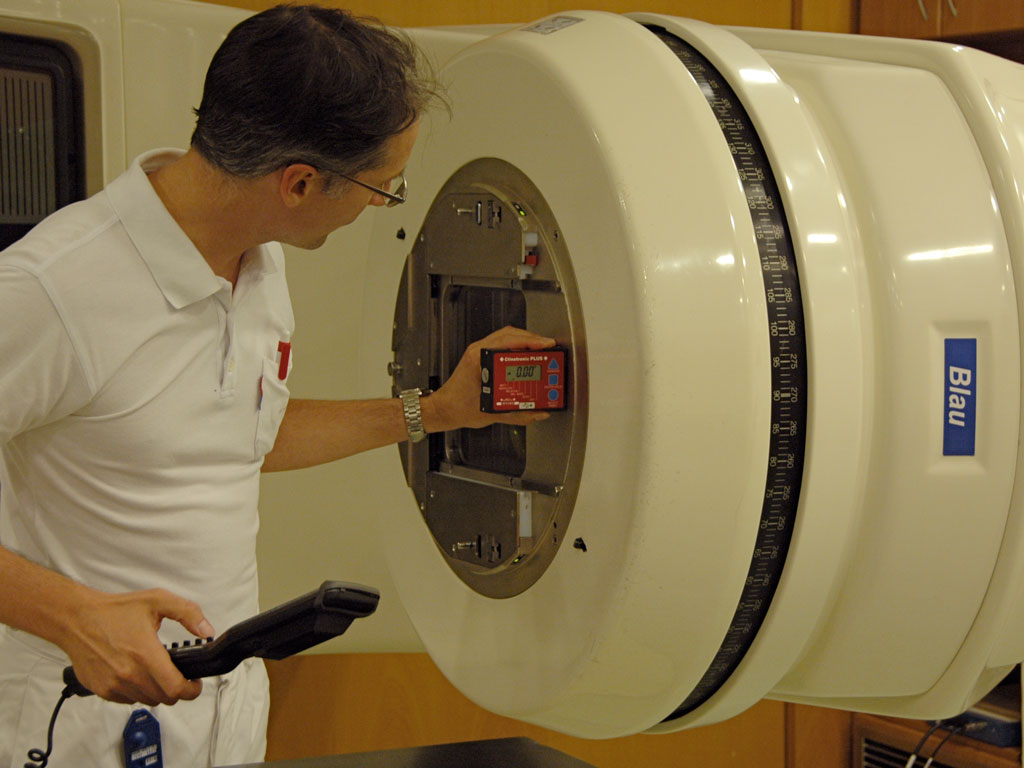
Calibrating the Collimator Rotation with a Clinometer
Going to the capture positions with a clinometer is straightforward. After direct comparison with the jaws (which is easily possible after the Mylar foil is removed), the four sides of the Collimator plate's cutout (see photo to the right) can be considered as a good surrogate. This direct comparison between jaws and cutout of course should be done once. All four sides of the cutout give the same clinometer reading to within 0.01°. This means that it is not relevant which of the four edges is used. I would say that calibrating the Collimator readout in this way is at least as accurate as referring to the bubble level, but much faster.
Setting up any Phantoms with the Clinometer
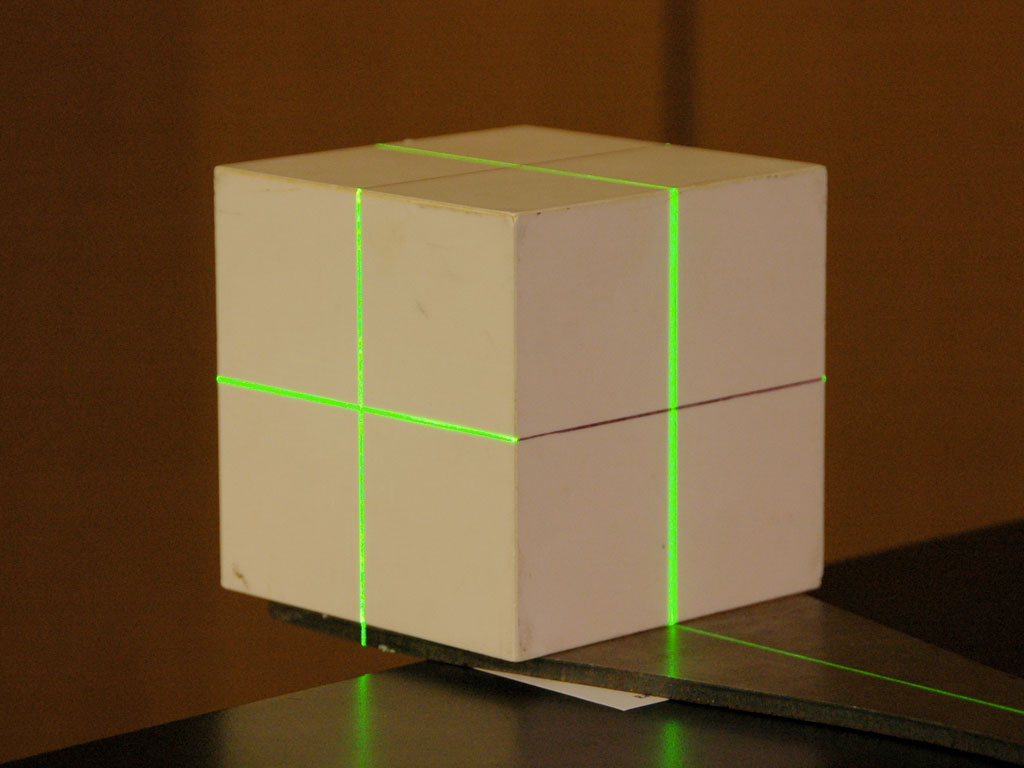
During constancy checks, it is often necessary to set up phantoms level with respect to gravity. As an example we show a situation where one would usually not expect any tilt:
 |
| If this were a robotic couch, one would say: "The Couch Roll is 0.26°." |
Without compensation, the Clinac couchtop is rotated by 0.26° along the longitudinal axis ("Couch Roll"). Here, the tilt was compensated with some white plastic cards ...
HK